Have you seen all of the new and awesome products in the Seize the Stamp shop? Soooo many amazing products and among them are some of the gorgeous Altenew 3D Embossing folders! I love these folders, as they add so much dimension to your project and it is fairly quick and easy to make a beautiful card. You don't need much to make both yourself and your recipient go WOW!

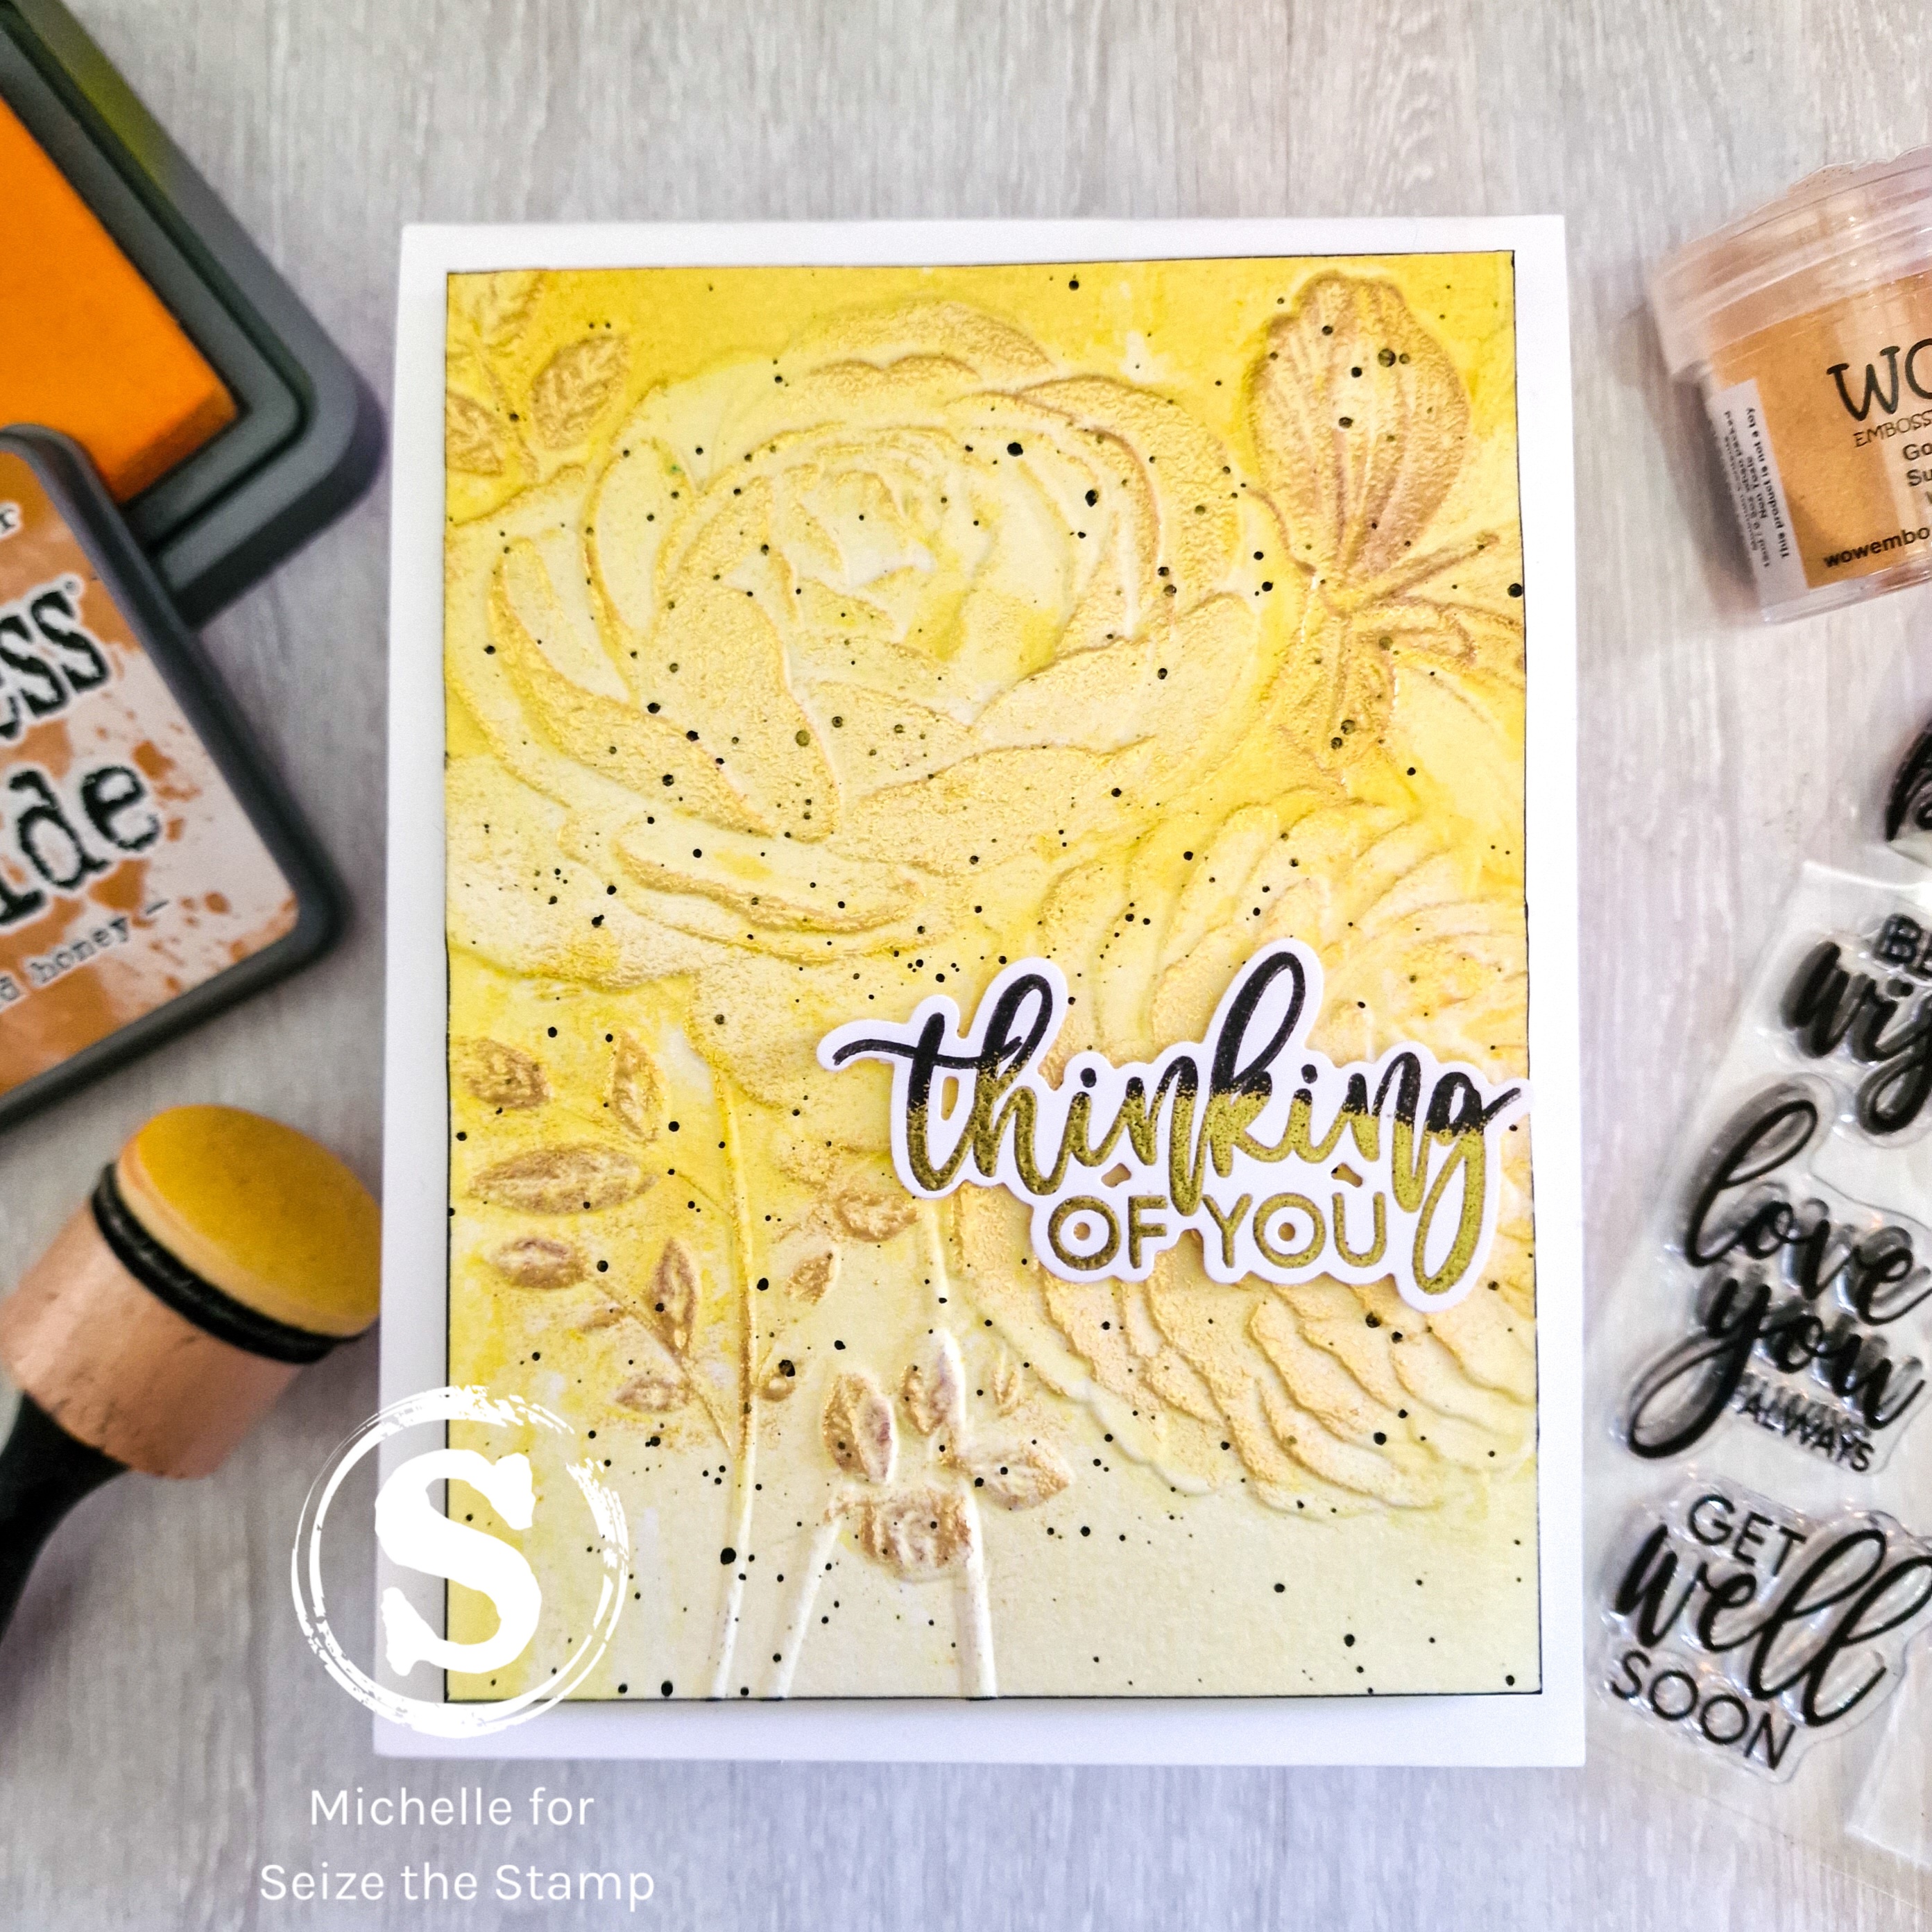
For my card I used the beautiful Playful Blooms Embossing Folder. I wanted to keep it fairly simple and keep the focus on the beautiful floral embossing, so I did a simple ombré ink blended background using Wild Honey Distress Oxide Ink on a piece of 4.5"x5.75" watercolour paper. I then gave it a very light misting of water on the back of the cardstock. I then trimmed it down 3.75"x5". Next I ran it through my die cutting machine. Finding the right sandwich for 3D Embossing folders may take a bit of trial and error, as they are thicker than normal folders and as well the type of paper you use will affect it too. But once you find it, you're good to go! Just don't push it if you get some resistance from your machine, as you don't want to risk breaking your machine....I've been afraid a few times lol. Also with embossing folders, I find that watercolour or mixed media paper will give you the best results and a slight misting of water too.

Once it was embossed, I went over the large flowers with a paint brush and water to remove some of the oxide ink to highlight them abit. Next I of course added some black flecks of paint using gouache. Once that was dry I went over it with my heat embossing tool to ensure that it was indeed dry, as I was going to do some heat embossing and that pesky powder will stick wherever there may be even the slightest bit of humidity. I ran my embossing ink pad lightly over the larger embossed area and used a finger dauber for the smaller areas like the leaves and stems and then sprinkled on some gold pearl embossing powder. I thought the gold went perfectly with the background, it is wasn't too much so as to distract from the embossing and was also translucent enough for the black flecks to show through.
To finish it off I ran along the edges of the embossed panel with a black sharpie, to add a fine little border without using additional cardstock. I stamped the sentiment from the Waffle Flower Essential Sentiments Stamp Set and coordinating die using Versafine Black Onyx Ink and because this stays wet for a bit, I was able to heat emboss part of it. I used the same gold pearl powder as earlier. I then cut it out and adhered it to my panel using some foam squares and then added it all to my A2 top folding cardbase using some craft foam.

This photo I took with a light shining directly on it, to try and show the beautiful shine from the embossing powder. It is very subtle but oh so pretty! I hope you have enjoyed my card for today and that it helps to inspire you a bit. Be sure to head on over to the Seize the Stamp shop and check out all of the new goodies! Oh and be sure to use code STSMICHELLE10 at check as it will save you 10%.
Thank you very much for stopping by and I hope you have the most wonderful and crafty day! Until next time,

- Altenew Playful Blooms 3D Embossing Folder
- Waffle Flower Essential Sentiments Stamp Set and Coordinating Die
- Ranger/Tim Holtz Wild Honey Distress Oxide Ink
- Versafine Black Onyx Pigment Ink Pad
- WOW! Embossing Ink Pad and heat embossing tool
- WOW! Embossing Gold Pearl Embossing Powder
- Winsor & Newton Designers Gouache Ivory Black
- small paintbrush
- foam ink blending tool
- black Sharpie
- Canson XL Watercolour cardstock and white cardstock
- liquid adhesive, small foam adhesive squares and craft foam


.png)
Be First to Post Comment !
Post a Comment