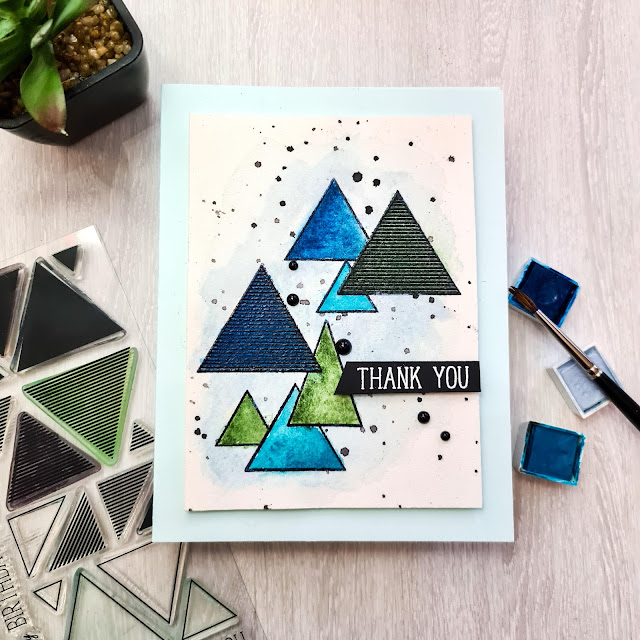
Hi friends...welcome back! Today I have my last class to share with you before my final project for my level 2 AECP and this class was all about masking. This taught us all about the power of masking and how it can elevate your projects. She went over so many amazing techniques using different forms and ways to mask off parts of your project. For my project today I decided to use 2 different ways.

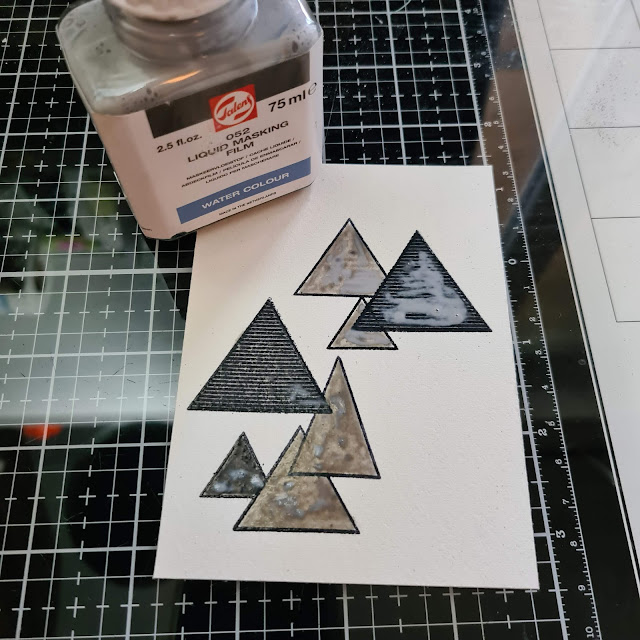
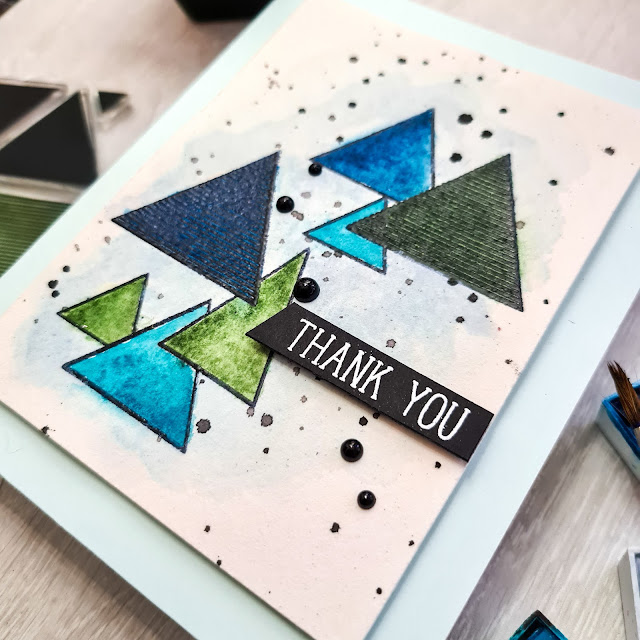
I knew right away that I wanted to use this geometric stamp set as it would be perfect for my "vision". So to start I grabbed a piece of masking paper and stamped out the 4 different size triangles, handcut them and set them to the side. Next I took a piece of watercolour paper, placed it using my Misti Stamp Positioning tool and brushed it well with anti-static powder, as I was going to be doing lots of heat embossing. I used the Misti to do all of my images since it is a textured watercolour paper and would need to stamp them 2, 3 (maybe even 4x) to get a nice and clear stamped image. I first decided which triangles that I wanted to be in the forefront and did those 2 first. I then stamped and heat embossed the remaining images, placing a masking paper triangle over the ones I wanted to be in front of the others (if that makes sense).

Once it was dry I used Caribbean Sky from the 36 Pan Watercolor Paints. I wet the paper first and then added a light wash of the paint. I let it dry and did it a second time, to have different layers of colour. I absolutely love this light grey-blue shade...so pretty! When I was heat embossing my images I forgot to add the masked image on the large striped triangle to the top right before I stamped out the smaller one to the left of it, so I tried to (and thought I had) remove(d) all of the ink before heat embossing, but I realized after I applied the watercolour that there was still the edge of it that was embossed...oh well.
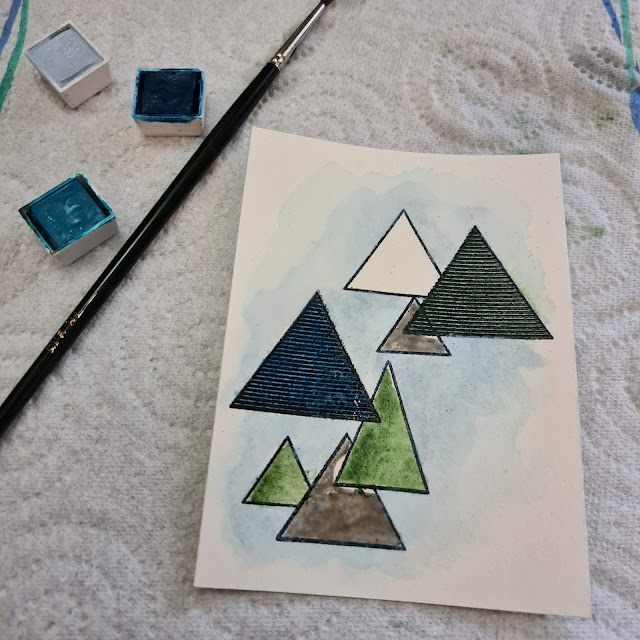
Once that was all dry, I started to remove the masking fluid from each triangle one at a time simply by rolling the film away with your finger. This is so fun to do and very gratifying when you see the crisp white space left behind from the masking fluid! I didn't do any fancy watercolouring, just simply added colour to them one by one, as I removed revealed image. I used Dusk, Lagoon and Evergreen for these and alternated so I didn't have the same colour touching one another. I did get a bit out of the embossed edges but I wasn't too concerned about that.

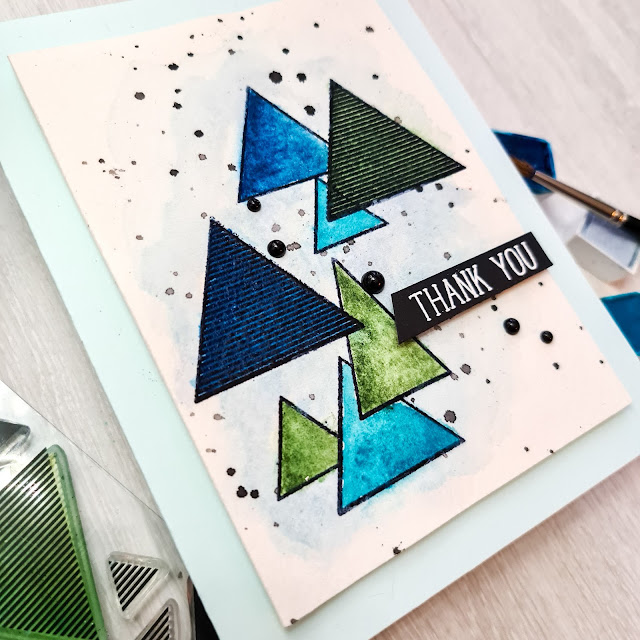
To finish it off I heat embossed the sentiment in white from the same stamp set and added it all to my A2 top folding card base with some craft foam. Then I adhered the sentiment using some foam squares and added a few black pearls, because I always need that little something extra to finish it. And that's it! I really like how this came together....it turned out exactly as I had hoped in my head.
This class was really resourceful and the instructor Svitlana made some beautiful projects using lots of different masking techniques. Many of these will definitely be put to use in future projects! Masking is a great way to add dimension and layers to your cards without the need for additional layers of paper. It is really fun and really there are so many possibilities!

Supplies used:
- Altenew Sohcahtoa stamp set
- Altenew 36 Pan Watercolor Set - Caribbean Sky, Lagoon, Dusk, Evergreen and Jet Black
- WOW! Embossing Primary - Ebony
- WOW! Embossing Heat Embossing Tool
- WOW! Embossing Ink Pad
- Stampendous Detail White Embossing Powder
- Talens Liquid Masking Film for Watercolors
- paint brush
- Arches 140lb Watercolour paper
- Inkadinkado Stamping Masking Paper
- ek Tools Anti Static Powder tool
- foam adhesive
- black flat back pearls
- black cardstock


.png)

CLASSY!!! Super duper amazing creation! I have missed seeing your work! Thank you for submitting your gorgeous work to the AECP assignment gallery.
ReplyDeleteThank you so very much for your kind words!
Delete