Interactive cards are always so fun! Who doesn't enjoy shaking a card filled with gorgeous sequins or a card that spins when you open it??? This next class in my level 3 AECP was Cards in Motion and it was all about interactive cards! This class was taught by Ashley Tucker and she had so many fun and fabulous interactive cards....this class was definitely lots of fun! She delved into the different types, from shaker cards to pop up cards and made them seem so easy and fool proof to make.
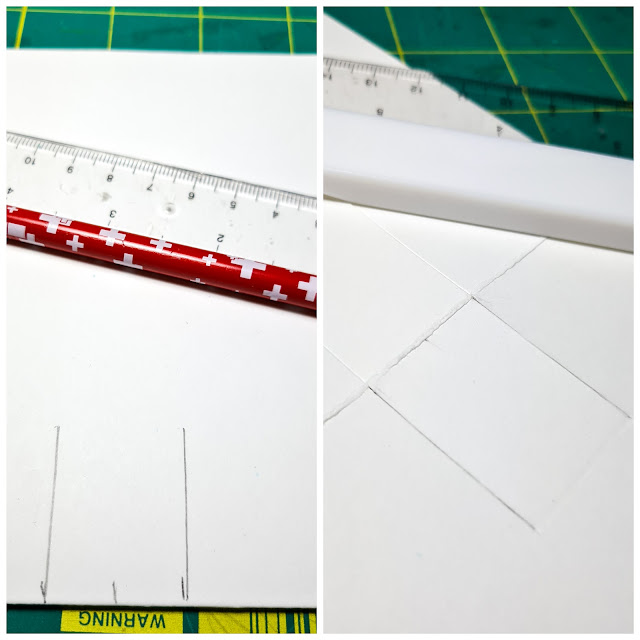
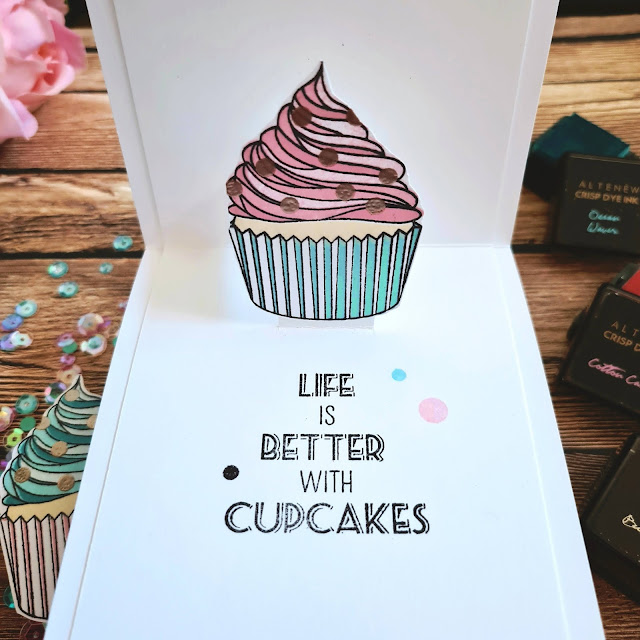
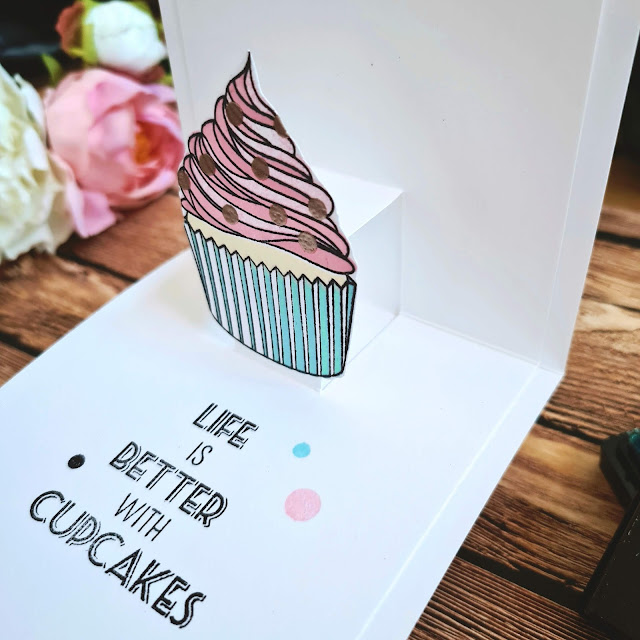
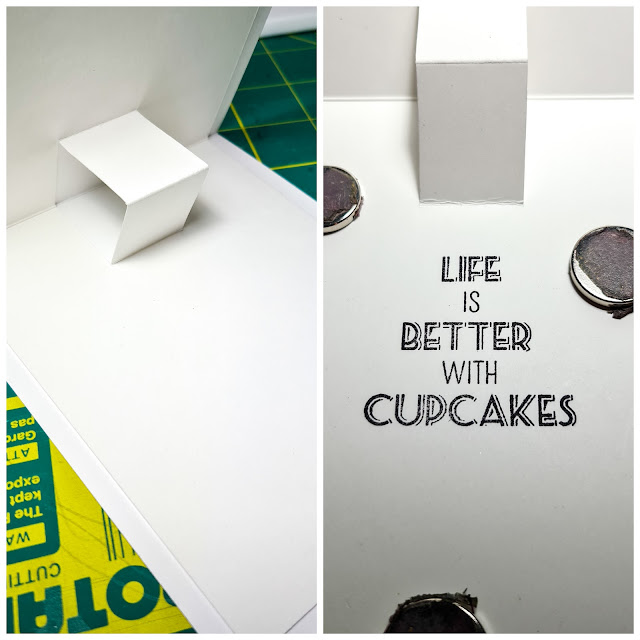 I trimmed down pop-up base so that it was 1/4" shorter on all 3 sides that are not folded and then adhered it to the inside of another top folding A2 cardbase. You need to make sure that you trim it down a bit smaller so that it fits snugly inside the cardbase. I stamped out the sentiment from the Layered Cupcake Stamp Set in Jet Black ink on the inside. I think sentiment this looked perfect there!
I stamped out the cupcake twice and did the layers using Buttercream, Cotton Candy, Sea Glass, Ocean Waves and Dusk. For the wrapper I only
used 1 of the 1 layering stamps. For the icing I used the varying
shades of blue and then for the pink, I used the same colour but stamped
it 1 extra time for each of the layers. Once that was done I fussy cut
them out and and added some "sprinkles" using a platinum embossing powder.
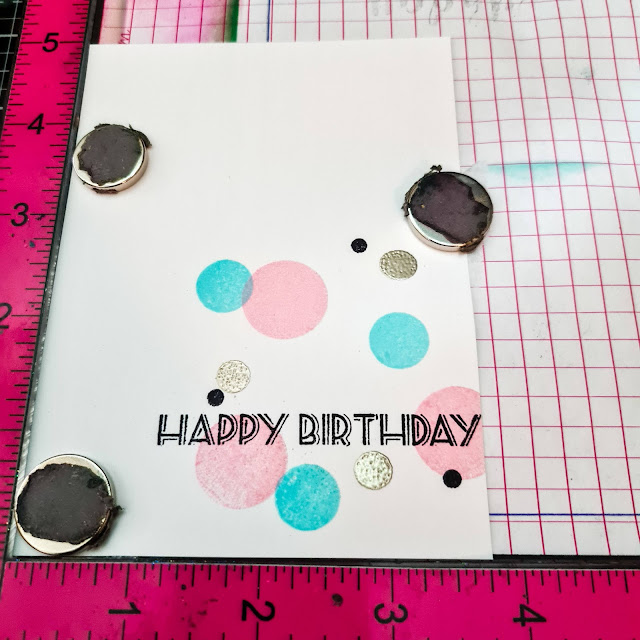
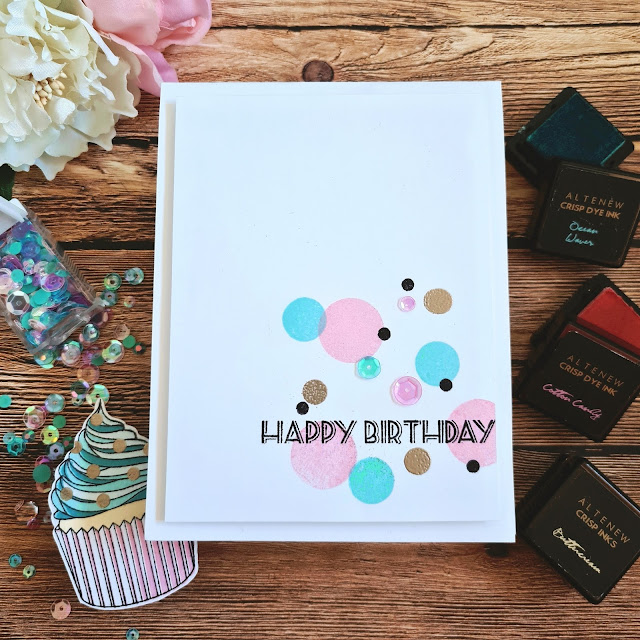
On the outside of the card I added the 4 different sizes of the circles
in the stamp set and each one 3 times in the colours used on the
cupcakes. I then added the happy Birthday sentiment in the middle and trimmed down this piece to 4"x5.25" and adhered it to the cardbase using some white craft foam and then added the cupcake to the popup tab using some liquid adhesive. To finish it off I added a few coordinating sequins to the front. After it was done I decided to add a few more of the small circles to the inside in the same colours to bring some of that inside and tie it all together.

I really love how this turned out and was very easy to make...easier than I thought. I did use a heavy weight cardstock for the middle part of it, so it made it kind of thick, so next time I will use a lighter weight cardstock. I will for sure be making more of these...I think 2 of my nieces will really love this style...so fun to make an open too!
I wasn't sure if it was a bit too clean and simple, but I really do love it! Thank you all so very much for stopping by today and eek...only 2 more classes to go until my final for level 3!I hope you all have the most wonderful day and find some time to make something.
Until next time 😀

Other Supplies Used:


.png)

I think this super! The inside adds a little pop to clean and simple!💗💗
ReplyDeleteThank you so very much for your kind words and stopping by :)
DeleteThis is fantastic!!! Love it!
ReplyDeleteI wasn't sure if it was too simple, but I quite like it! Thank you very much for your wonderful encouragement :)
Delete