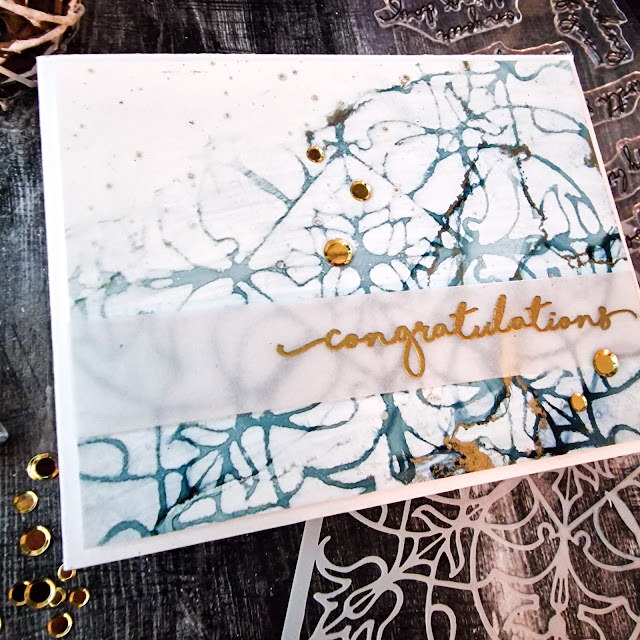
Hi friends....I`m back with a rather simple card today. The Renaissance Stencil from Visible Image is a really beautiful, even elegant design I`d say and quite detailed stencil, that I felt it needed something as equally elegant, but still simple to keep all the focus on the design.
I started with an alcohol ink background that I already had in my stash...I love the soft muted blue/greens in this piece. I had a big play session one day with my alcohol inks and this background was one of the results. I wasn`t quite sure of it at first, but I never throw out a background, because you never how you can use them and you may also change your mind later.
Next I got out the Renaissance Stencil. This is really such a beautiful stencil that I`ve been waiting for the perfect project to use this with and I think that this turned out perfectly!
I decided to to an alcohol ink lift technique. Yes I know...all of that beautiful alcohol ink and I`m just going to remove it all lol. Yes you do remove almost all of the ink, but what you are left with is the ink remining underneath the stencil design. So it is kind of like the verse of how you would normally use a stencil with ink.
Alcohol lift ink comes in a pad and also a reinker bottle. For this I used the reinker bottle and a clean foam ink blending tool. I simply added some of the lift ink to my work surface, dabbed my foam applicator into it to pick some up but not too much and I started to apply it all over the stencil in a dabbing motion, rather than how you would blend ink. You can see the magic happen almost right away.
I continued to dab away until I was happy with how much ink had lifted...for this I lifted almost all of it. The gold metallic did remain though.....that won`t lift and I quite like how the gold stays. I then took a paper towel and dabbed away any excess ink left on the surface. This is when the design really pops, as I find the lifted areas become whiter. You want to make sure you dab at it rather than rubbing the paper towel across it, so as not to risk smearing the ink and removing any remaining design. Once I felt it was good I removed the stencil and took a clean area of the the paper towel and gently buffed the surface of it.
I trimmed my piece down equally on all 4 sides and added a few splatters of gold alcohol ink. You have to work quicker with this than you would say with a gouache or watercolour, as alcohol ink reacts differently with the air. It also dries instantly on contact with your paper. The splatters are a bit finer and more subtle with the ink compared to other mediums as it is a much thinner consistency.
For the sentiment I heat embossed on gold the congratulations from the Go To Words Stamp Set in vellum as I didn`t want to cover up too much of the background. Vellum is perfect for this as you cam still add what you need but as it is semi transparent, your work still shows through.
I really love how this turned out. It shows off the stencil beautifully and I cannot wait to use this stencil again! Thank you so very much for stopping by and spending a few minutes of your time with me.
I hope you manage to find some time to sit down and create something wonderful today! I wish you all the most wonderful and crafty day.


.png)

Be First to Post Comment !
Post a Comment