
Christmas in June is a thing...right??? Visible Image has a new release coming on July 1st and we are sharing lots of sneak peeks of the amazing new stamp sets....head on over to my Instagram to see more! For my card today I used the Christmas Robin Stamp Set. It has the most beautiful robin images in it but I decided today to focus on the holly and berries. Is there anything that screams Christmas and Winter more than Holly???
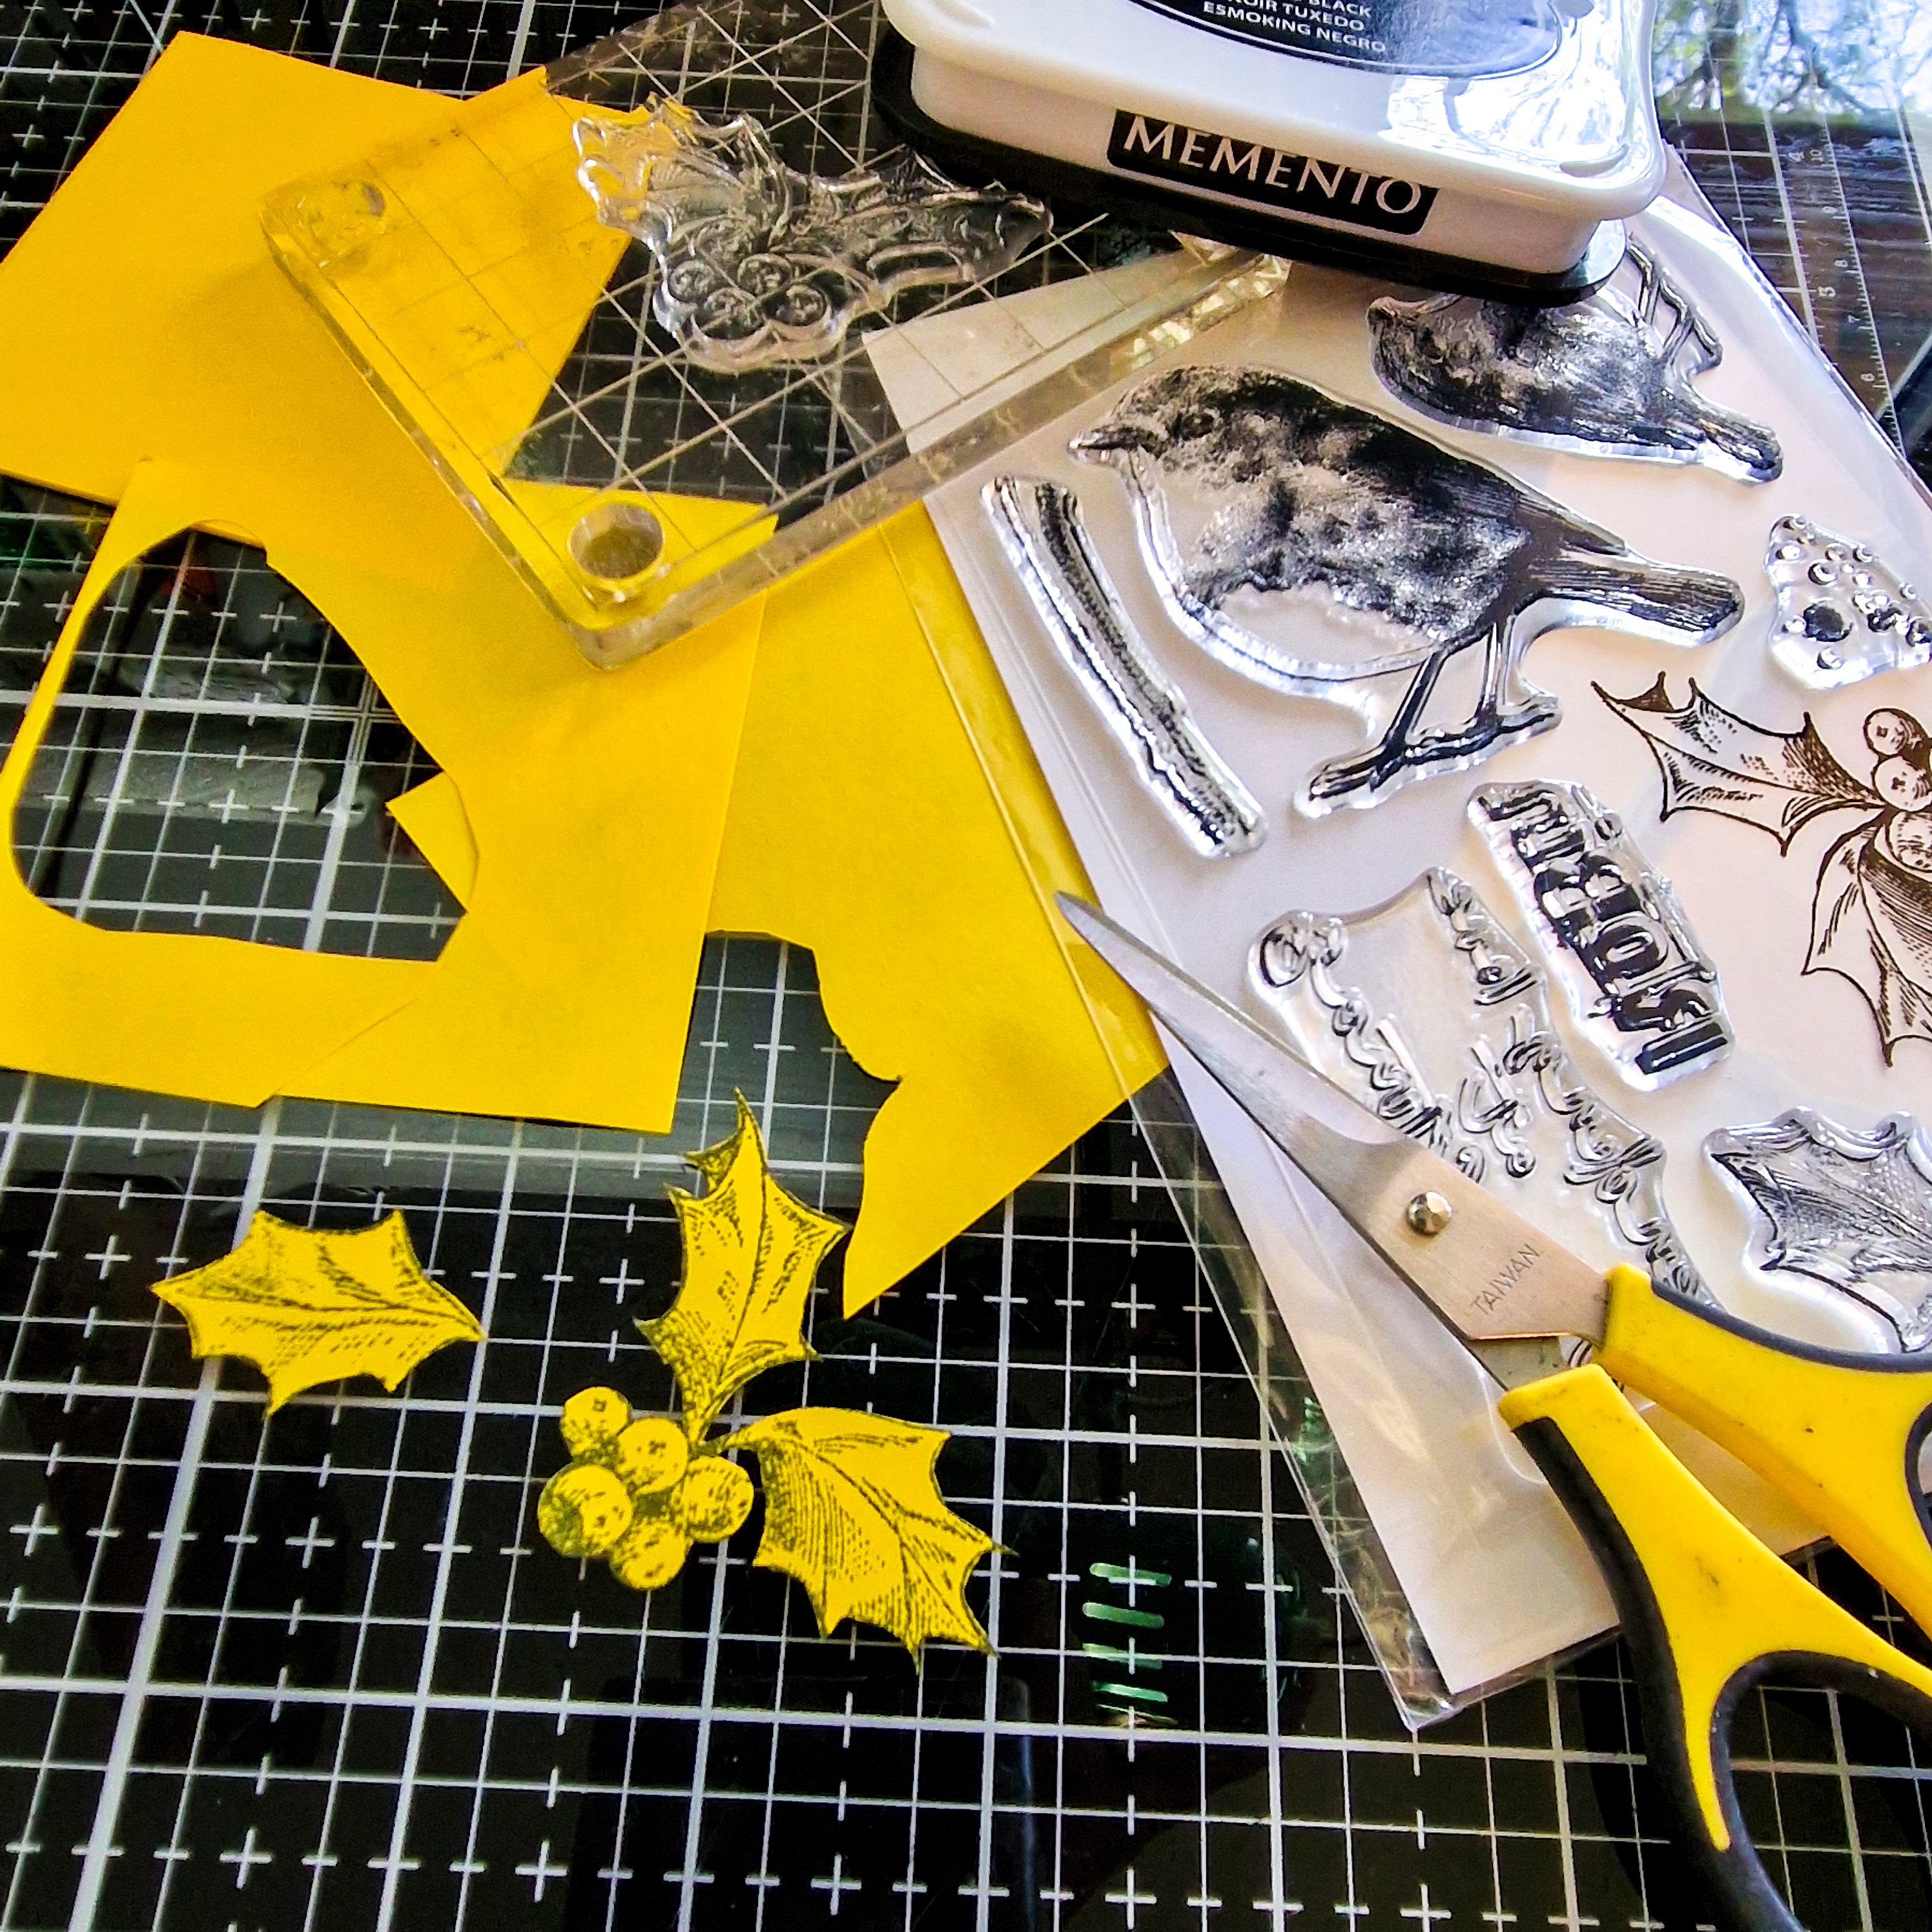
I started by stamping the holly images on some post it notes, as I was going to be doing some masking. You want to make sure that you are stamping most of your image on the sticky part of them, as you want to be able to stick the masked image down. These are great to use, as they have that stick and they aren't too thick, so you'll get a perfect masked image everytime. You also want to make sure when cutting out the masked images that you cut just on the line of the stamped image. That way you won't have a gap in between the image you have just stamped and the one once you peel back the mask on top (I hope that makes sense).

Next I start stamping my images using a black waterproof ink, as I would later be doing some watercolouring and I didn't want the black ink to bleed at all. In the beginning I stamped out one of the holly with the berries and the single leaf, but I only used the one with the berries in the end and I did stamp and cut out a second one of this same image.
I continued to use the masks to stamp out and mask the images, so that they overlapped cleanly and some appeared to be from behind or in front of others. I really love the depth that this gives! It may take a bit more time as you need to fussy cut the masks, but it is well worth it in the end.

Once I had all my images exactly as I wanted them, I went in and did a second type of masking. This time I used a liquid masking fluid, so that I could go in with some watercolour for the background, but it would leave the holly and berries untouched. I could've simply just went over the entire image without masking them off, but then the holly and berries would have a blue hue to them and it wouldn't have that "clean" look I was wanting to achieve. I applied a thin but not too thin layer of the masking fluid and allowed it to dry. It really doesn't take too long for it to dry....I maybe left it 15 mins. Am I wrong to have quite liked the gray colour of the masking fluid??? lol I thought it looked kind of cool, but it wasn't the look I was going for.
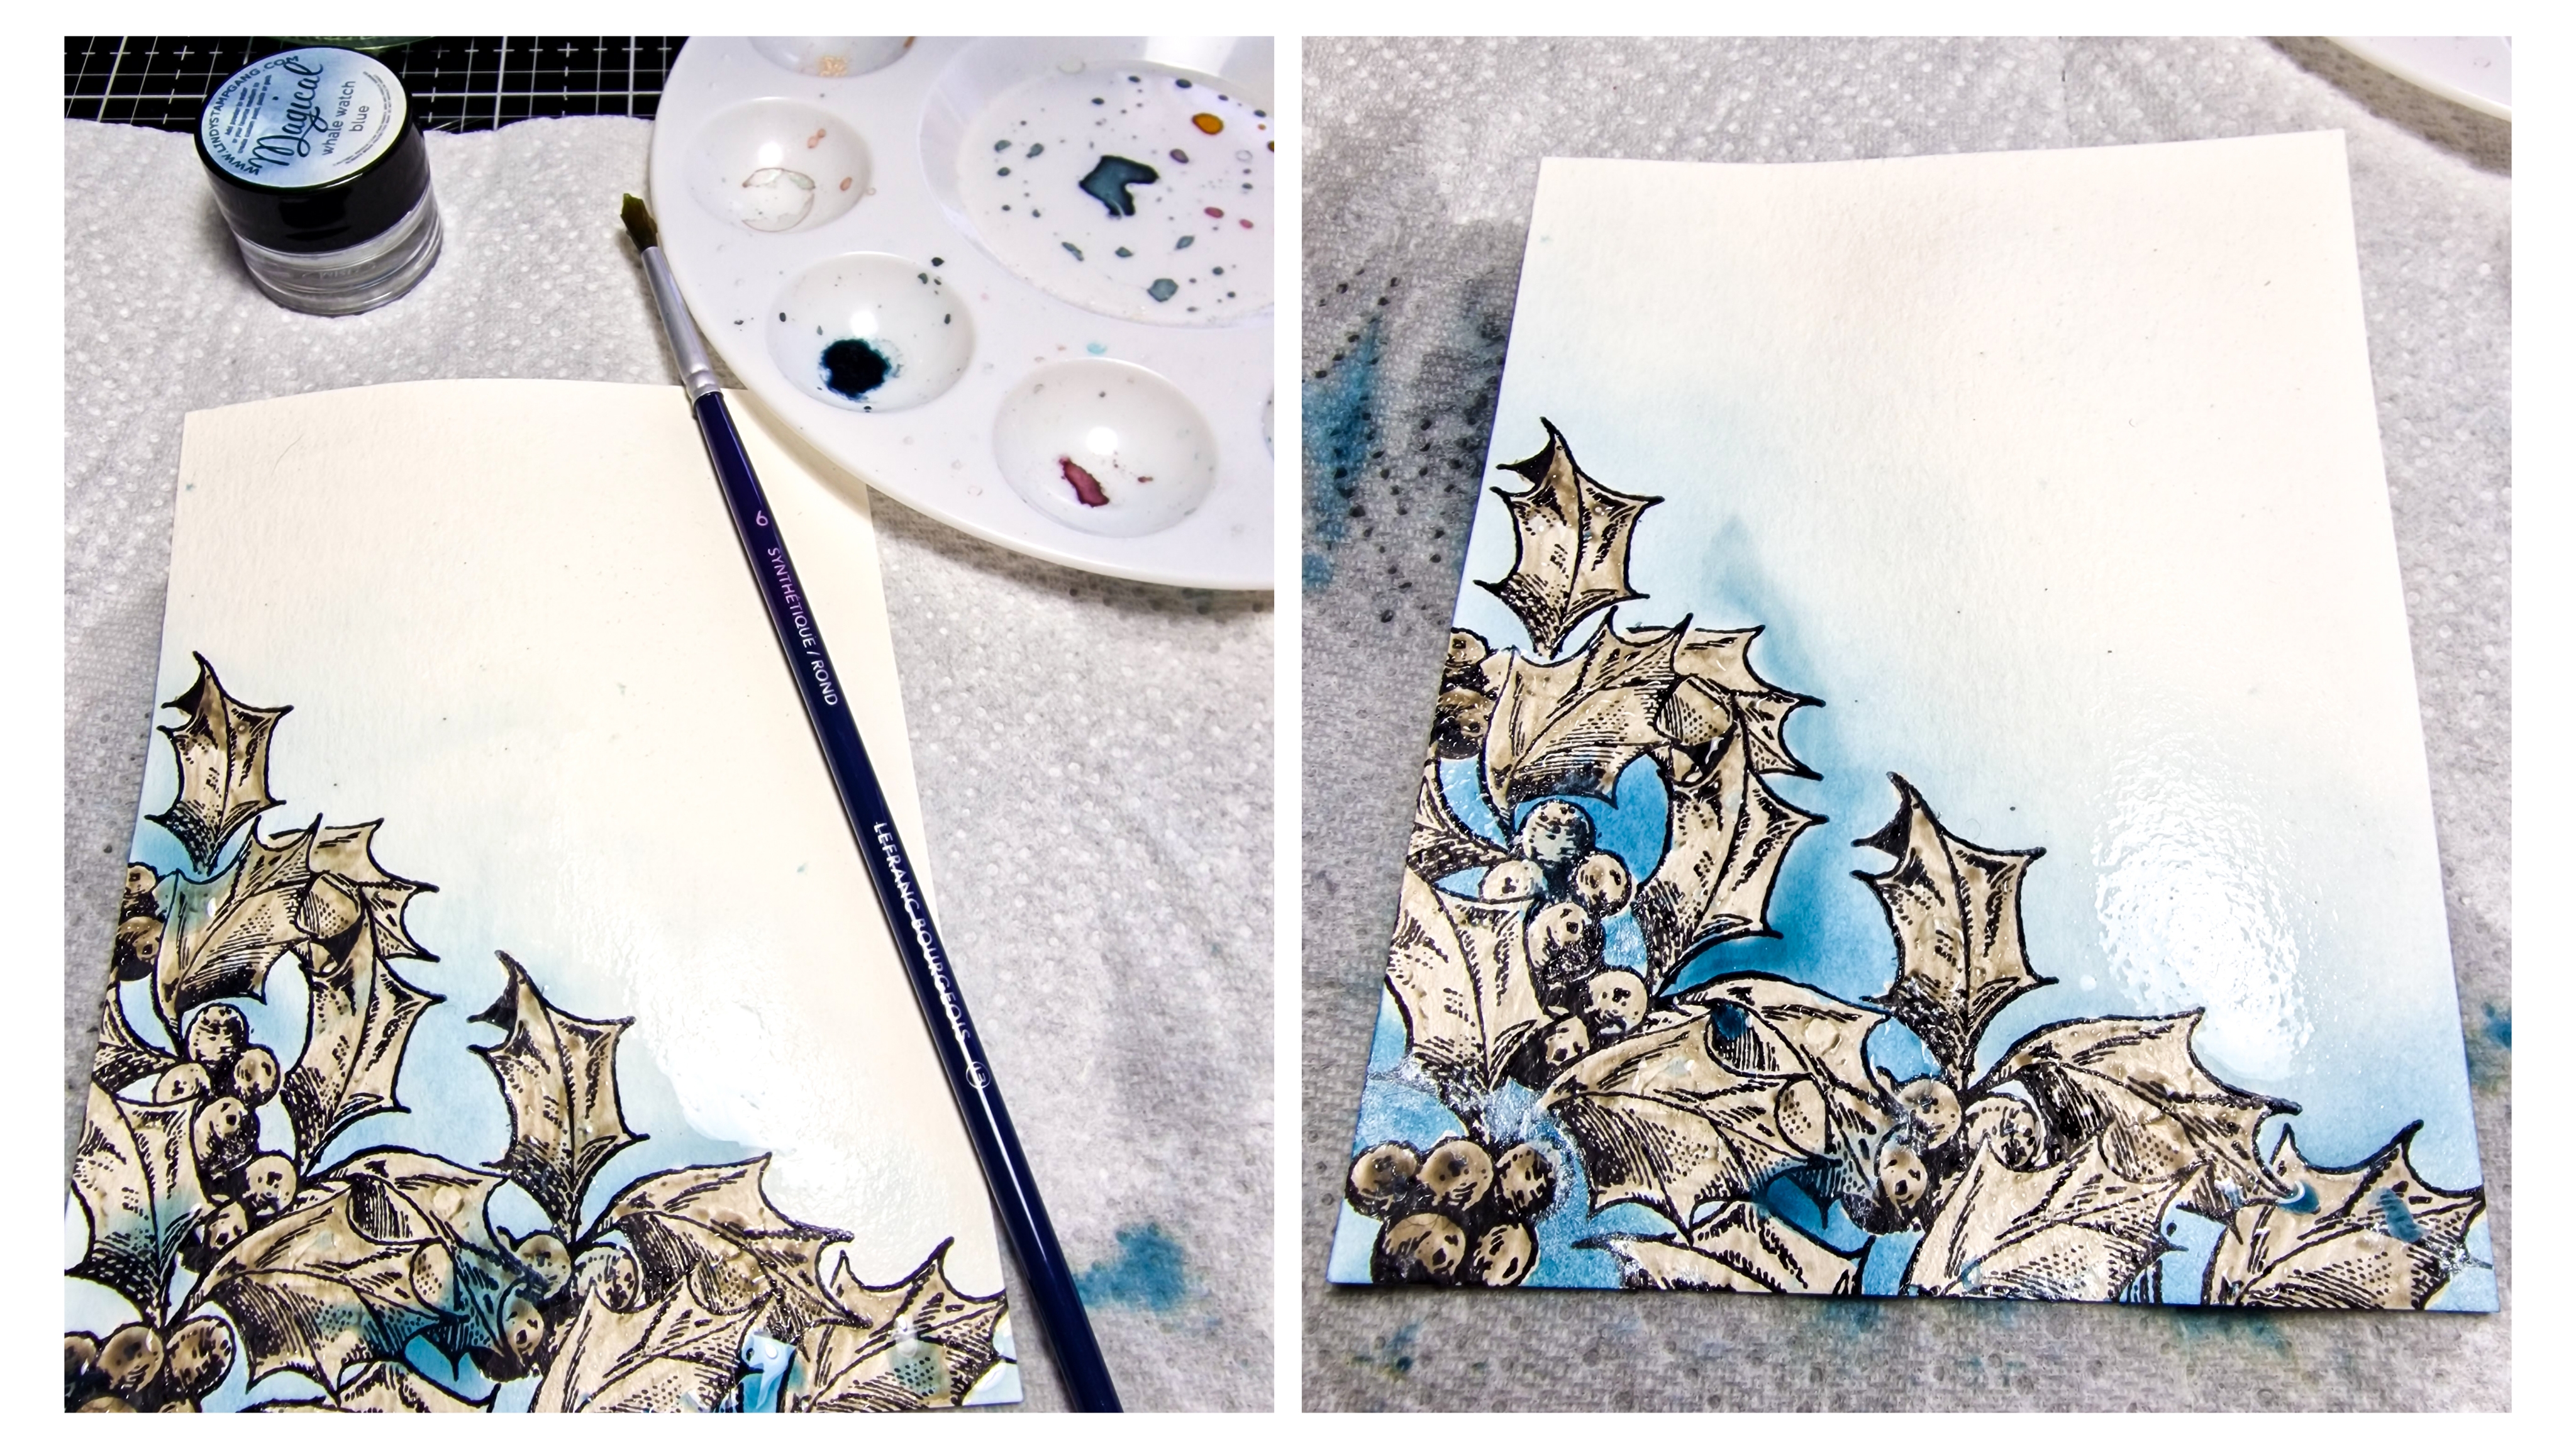
Once the masking fluid was dry, I added some water to a few different shades of blue pigment powders and did a light wash, to lay down a base colour over my images. Once that first initial layer was dry I went in over top with a bit more colour and ensuring it was darker with each layer, to add that depth to it. I continued to do this until I was happy with the layers and colour I had and then set that aside to dry.

Once the background was completely dry I went in and started to peel off the masking fluid. To do this all you need to do is gently rub over it with your finger and it just kind of rolls away, as when it dries it is sort of like a rubber. I find this so satisfying and and fun to do lol. I love the reveal of a masked image...something about that clean and untouched image under that is simply perfect! Next I started to add some colour to the holly and berries using some watercolour markers. I scribbled some colour onto my glass mat and added the colour that instead of direct pen to paper. i find you get a softer look this way. I added the colour again in layers as I did for the background, to try and achieve that bit of depth to it.

To finish it, I added some white paint splatters using a gouache. I was going to do black as well, but in the end decided that the white were enough. Next came the sentiment using a black ink and then I mounted it on a white A2 cardbase using some white craft foam and added afew clear droplets and that was it.

I love the vintage feel of the holly images and paired with the font of the sentiment is just perfect! This stamp set with both the holly and the robins could really last you well past Christmas and for the entire Winter season.

All of the new Christmas sets are available for pre-order but they are being released for immediate purchase in only a few days time! Be sure to head on over to check out the rest of the release and hea don over to their Instagram to see lots more inspiration! I'll be sure to share more as well!
Thank you do very much for stopping by today. I hope you have the most wonderful day and that you find some time to sit down and create something wonderful! Until next time,

Supplies Used:


.png)
Be First to Post Comment !
Post a Comment