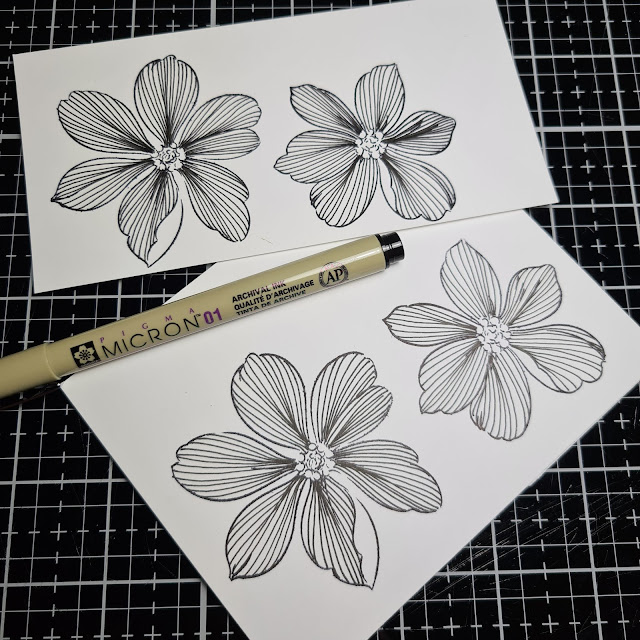
For the flowers I stamped both of the flowers from the Fabulous Florets stamp set using the Jet Black Ink. I had lots of fun practicing the different types of Zentangles she went over. I kind of got lost in it all and really enjoyed it! You can just forget about everything and just do them over and over for hours. For the flowers I did the very simple Aura Tangle, which mimics the lines and curves of the flower petals.....I love the simple yet very effective interest it lends to them. I'm not sure if I was doing them correctly, as at certain points on the base of the petals the lines met up and kind of gave them a fold type of look to them. I really kind of love the way this looks....it just adds a bit more dimension to them. I used a 01 Micron pen for the Tangles, so the lines would be nice and fine. I did have a smaller 005 but I decided on the slightly broader tip.
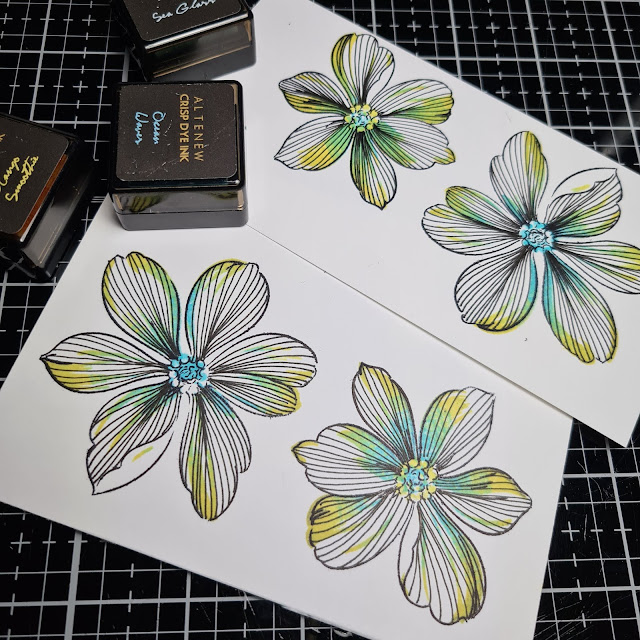
To add some colour to them, I took the detail layered stamp for both of them and inked them both first using Mango Smoothie and then went around the outside of the stamp using Ocean Wave to give it a fun look.....I really like how they turned out. You also get a bit of green where the 2 colours blended together.
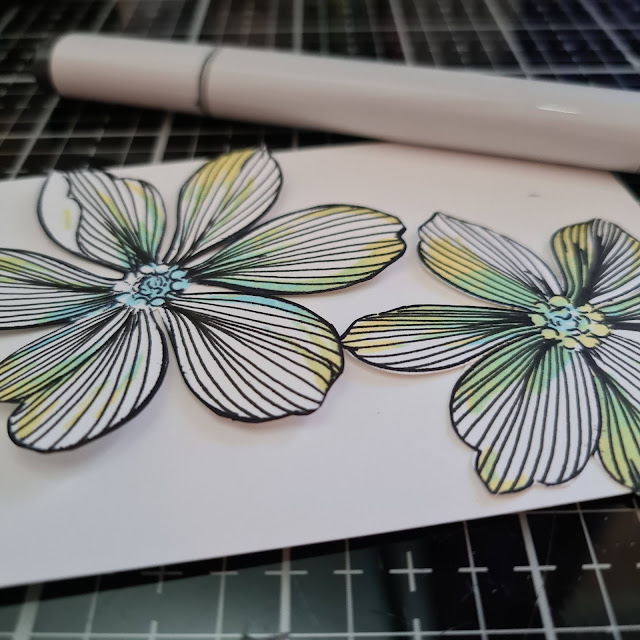
Next I fussy cut them out and went around the edges with a black Copic marker. I find that it really finishes them off perfectly and covers it a bit in case there was a bit of white edge still showing. The flower on the left was with the black edging and on the right is just after fussy cutting before the black edging so you can see the difference it makes. It's the little details that make the differences.
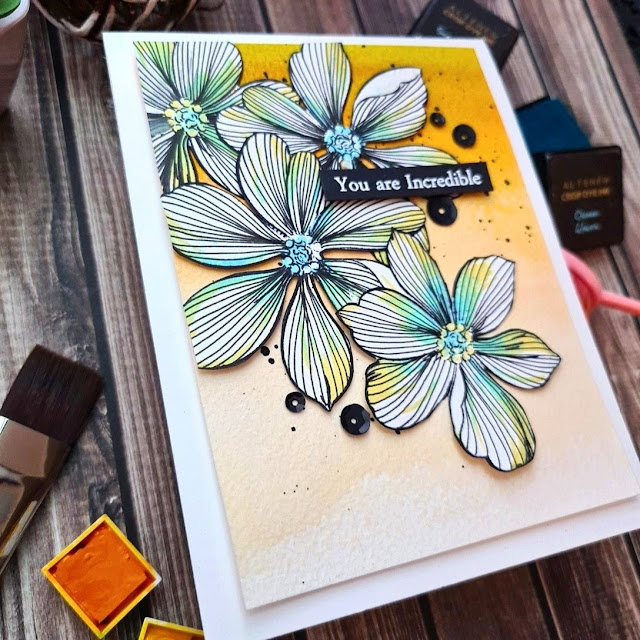
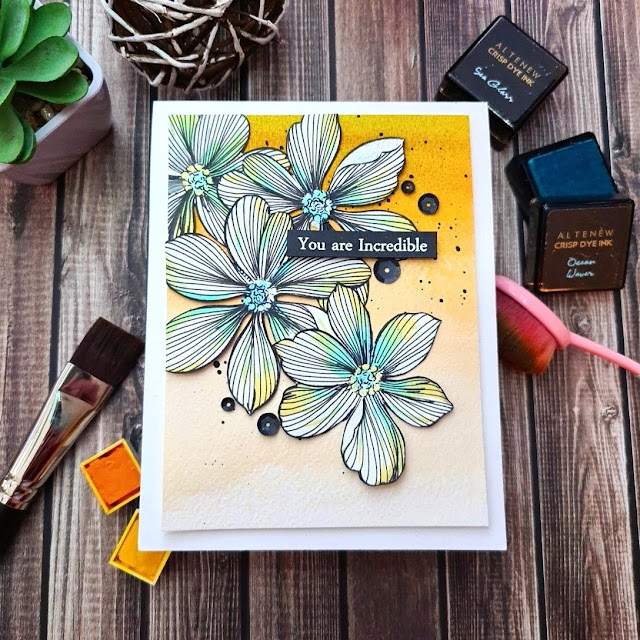
To finish it off I white heat embossed on black cardstock the sentiment from the Persian Motifs stamp set. I arranged all the flowers and adhered them directly to the watercolour panel, popped up the sentiment using foam adhesive and added a few matte black sequins to finish it.
Now this card you see above is not what it originally started out as and it also very strategically hides my change of mind. When I had originally done the watercolour panel, I actually hated it so much that it went in the garbage. I then decided that I was going to do a soft blue ink blended background for it, but it just didn't have that oompf factor...that WOW. So in the garbage the ink blended piece went and out the watercoloured panel came. I then decided that I was going to try and do a few more of the Tangles that we learned on the cardstock, coming out from the flowers.
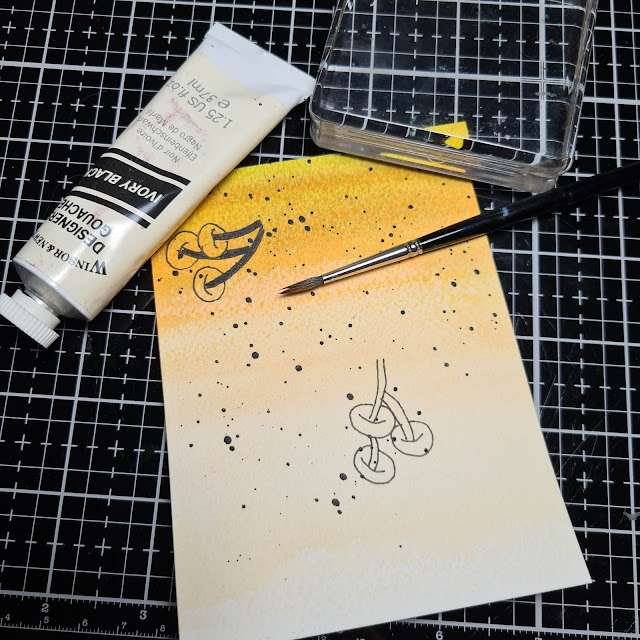
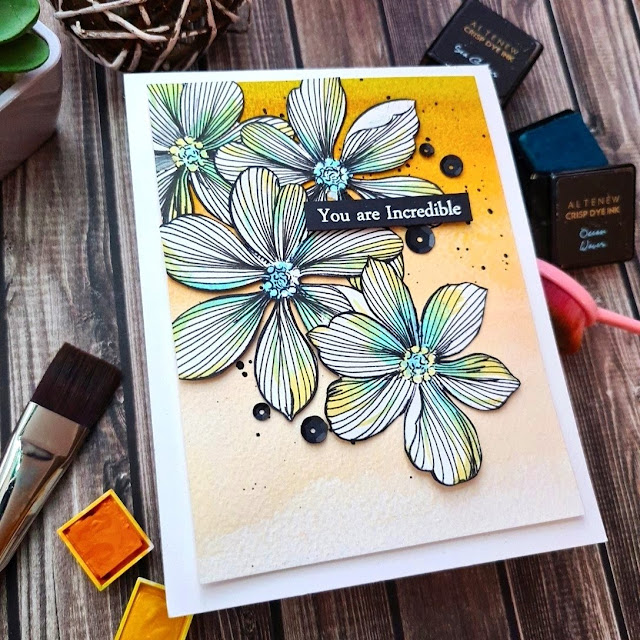
However I didn't really like how it looked and it was actually kind hard to keep them neat and smooth looking on the watercolour paper, as it is textured. So in the end I wasn't happy with it and back in the garbage (okay not exactly the garbage, but to the side to go in the garbage once I was done lol) it went. Back came out the blue ink blended piece and I did the same style of Tangles on it but I still wasn't happy with how it looked. I guess I really need to practice quite a bit more the others we learned until I'm happy with them. In the end I decided to keep this simple, so back out came the yellow watercoloured background...for the final time lol. As I had already did a bit of tangling on this piece, I had to very carefully and strategically place the flowers so that they covered them up and you know what....I think I succeeded pretty well doing that. If you didn't know they were there, you'd have no idea....heck I can't even see them now.
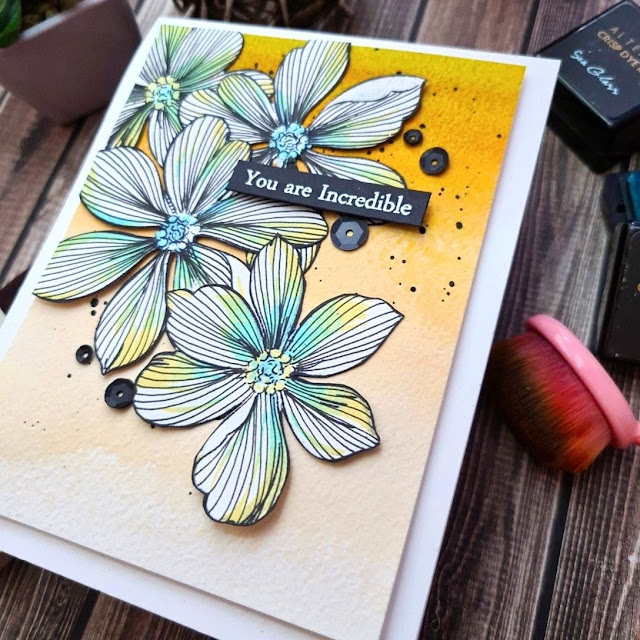
Anyways after all of my indecisiveness and going back and forth, I finally decided to keep it simple and keep it focused on the very simple but effective Aura Tangle. Like I said before I really enjoyed this class and can definitely see myself getting lost in this and spending hours practicing it and using my new little kit I bought. Amber is a wonderful teacher and made you feel so comfortable trying this and like anyone can do this, no worries. It really allows your creativity to come out and gets lost in it.
Thank you so much for stopping by today. I will see you all again very soon for the next AECP class.....I'm almost at the end! I hope you all have a wonderful and crafty day. Until next time 😀

Supplies Used:


.png)

I love all the steps and didn't realise the lines one these flowers were not stamped but drawn by you. They look amazing as do the touches of colour. The background is perfect and really emphasises those flowers. What a beautiful creation sweetie, love it
ReplyDeleteThank you Aileen! Yes the lines in the flowers were all done by me. The Aura Tangle is a very simple one yet quite effective and I love the interest it adds to the flowers. I am glad that I held on to this background, as it actually makes the flowers really pop. Thanks for visiting my blog :)
DeleteSuch devotion! The finished product certainly doesn’t show “exactly “ how you got there or your “different steps”! The finished card is terrific and that’s what counts, isn’t it! Sharon
ReplyDeleteThank you very much for your kind words Sharon! I tried to hide the mistake along the way. Thanks for stopping by and visiting my blog :)
DeleteI love your card! It looks gorgeous!! So so so beautiful!!
ReplyDeleteThank you Erum! I'm pretty happy with the final outcome :)
Delete