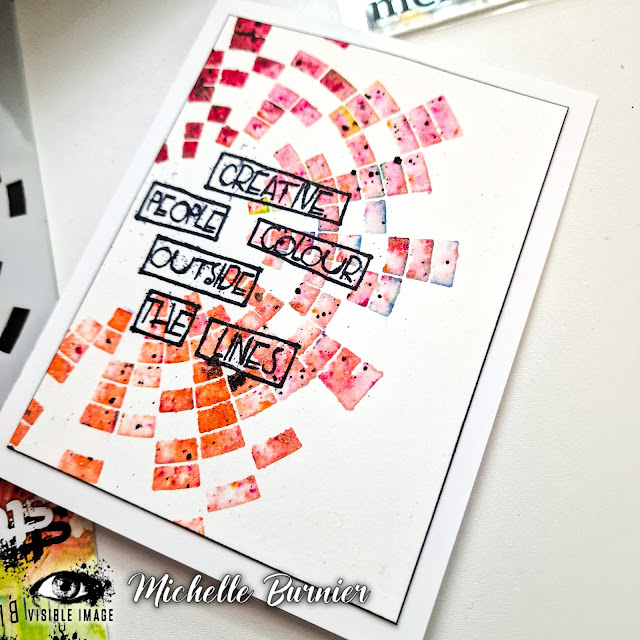
Hi friends....I hope you`ve all been well. I am back featuring some new products from the latest release from Visible Image! As soon as I saw this new stencil in the release, I knew exactly what I wanted to do and it turned out just as I had envisioned! I hope you aren`t sick of seeing this technique yet, because it is one of my faves and will never get old lol.
I did make 2 cards today, but changed up the colours, the orientation of the stencil and sentiment. To begin both of them I sprayed the back of the Breakout Stencil and stuck it down really well to a piece of hot pressed watercolour paper. I used hot pressed, as it has a smoother surface that would be perfect for stamping on later.

When I had first this idea in my head, this was the one that I had wanted to bring to life. To start I choose a rainbow colour palette of pigment powders. I sprinkled on the colours in rainbow order, being sure to overlap each one slightly, to have a nice colour blend and then spritzed with some water. I had actually wanted to do a colour wheel type of look initially, but I was afraid that some colours next to one another might not blend too well. Once I let the powders sit for about 30 secs and then dabbed off the excess water and powder with a paper towel. By keeping the stencil on, you don`t run the risk of smudging any excess powder and water that may still be on the paper.

For the 2nd card, I went with a palette of pinks, although one colour looks more of a coral in the pics. For this one I also added some black splatters. I kept the stencil on to dab off any remaining water and powder and added the black splatters. It was set aside to dry for a few minutes before removing the stencil, so the risk of smudging the splatters would be minimal.
Both panels were trimmed down and I stamped both sentiments using Onyx Black Versafine Ink and then heat embossed them using black embossing powder. I used the new
Happiness Matters Stamp Set for the rainbow card and for the pink ombré card I used the
Brighten the World Stamp Set. Looking back I should have embossed them using clear embossing powder, as I did get some little black flecks of powder.....but nothing too bad.
I then ran along the edges of both panels using a black marker to add a fine black border. Both were directly adhered to a white A2 cardbase.....and that`s it! I love how these turned out.....they are exactly as I had imagined!
I love using this simple technique to help to showcase these amazing powders....they really help the stencils to shine and be the main focus!
If you haven`t seen the brand new release from Visible Image, then head on over and check it out....you won`t be disappointed....but then again, are you ever with them?! I think that this stencil ma be going into my favourites and I am sure I will be using this over and over again.
Thank you so very much for stopping by today and spending a bit of your day with me. I hope that I have inspired you a bit. I wish you all the most wonderful and creative and that you find sometime to sit down and create something amazing! Until next time,


.png)

Brilliant - really helpful, thank you. Can't wait to try it!
ReplyDeleteThis looks so good... I've only got brushos but I'm going to give it a try... My stencil arrived yesterday 😍
ReplyDelete