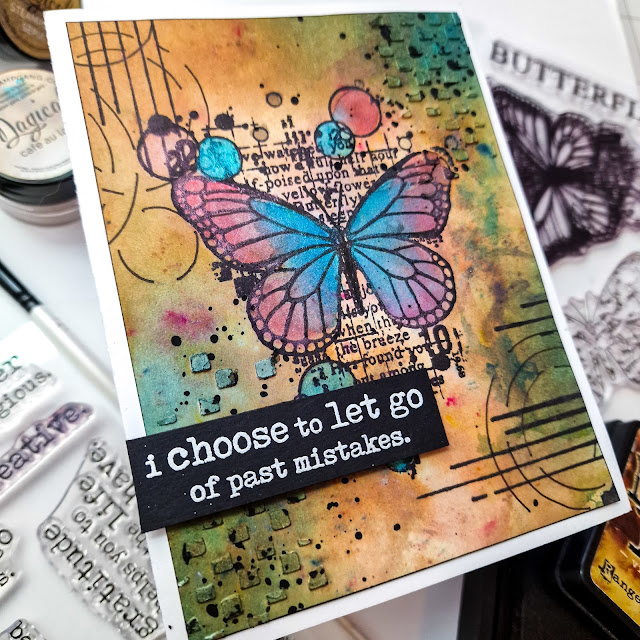
Hi friends----welcome back! Today I am sharing a mixed media card using some products from Visible Image. For the main focus I used the new Antisocial Butterfly Stamp Set from their latest release and paired it with a few of my go to favourites. This set features 2 gorgeous butterflies and we all know that Visible Image does butterflies so well!
To begin I took a few different colours of my favourite pigment powders, added some to a piece of mixed media paper and spritzed with water. I allowed it to dry and then went in with some more on a piece of acetate and added more to specific areas. It was then all allowed to dry.
Next I turned to my favourite go to background stamp set, Shape It Up and added some of the line image to the left and bottom right corners, changing the orientation of it. If I ever had to pick a top 3 from Visible Image, then this set would definitely be part of that list!
Next I used the Ripples Stencil but not in the way you`d typically use a stencil. Instead of ink blending or adding a textured medium through the stencil, I took a fine tip black pen and traced a few of the circles where I stamped the previous images.
I lost a few of my process photos up to this point but I also used the Seeing Stars Stencil and added a bit of the checkered pattern in the opposite corners using some texture paste. This was allowed to dry and then I went back in with more of the pigment powder. but this time it was already mixed with some water (kind of like a paint) and I added more colour in specific areas to add more depth and layers to it.
I added some colour to the butterfly and a few of the small circles to help them to pop a bit and stand out from the rest. Some black flecks of paint were then added. Once that was dry I ink blended around the edges using a dark brown and a blue distress ink to add even more depth and interest to it. For the sentiment I had originally planned on using the one in the Antisocial Butterfly stamp set but changed my mind and used one from the Affirmations Stamp Set. I added a border to my piece using a black marker and then adhered it all directly to my cardbase.
This is really a gorgeous stamp set and speaks volumes...I know that I myself have definitely felt like an antisocial butterfly on more than 1 occasion. Thank you so very much for stopping by today and I hope that I have helped to inspire you to create something amazing! I wish you all the most amazing day and until next time,


.png)

Be First to Post Comment !
Post a Comment