
Well I did it.....I finally did my final Zoom Workshop for the AECP program! I am so happy to be able to finally post my final challenge and step on my AECP journey!
What a journey it's been! This program has been such a wonderful and amazing experience. I have learned so much and many new techniques along the way and throughout the 25 classes that I have had the immense pleasure to take to make it to this point. I feel like my crafty toolbox and my knowledge and skills have grown more than I thought or imagined.
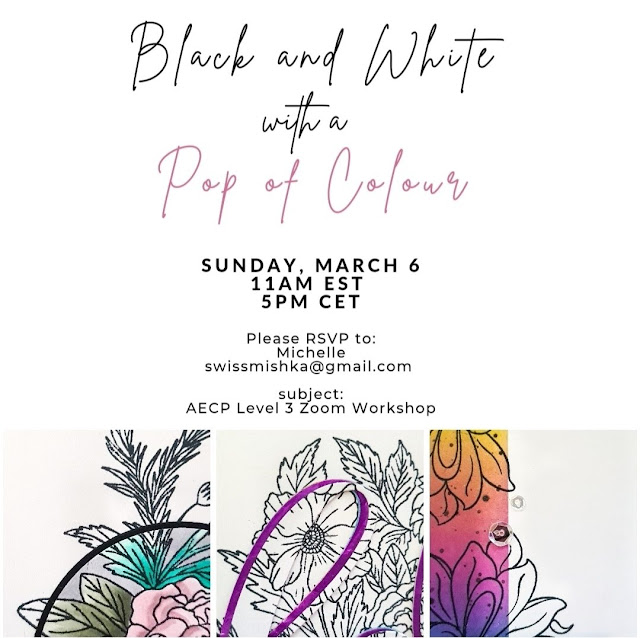
For my final assignment I was given the task of hosting a 2 hour workshop, whether that be in person or virtually via Zoom. I decided to go the virtual route because as with the Covid situation the numbers were still pretty high here in my region, so I thought best to be safe that way. And as well I don't know many people local to me that are crafty. Next I set a date for 1 month away and decided on the theme and made sample cards that I would be teaching in the workshop. I presented my ideas to both Erum and Virginia and yeah...it was a go! You are pretty much given free reign for what techniques and styles you would like to teach in your workshop, which I felt was a challenge in itself, as oh my goodness... there are so many options!
Planning
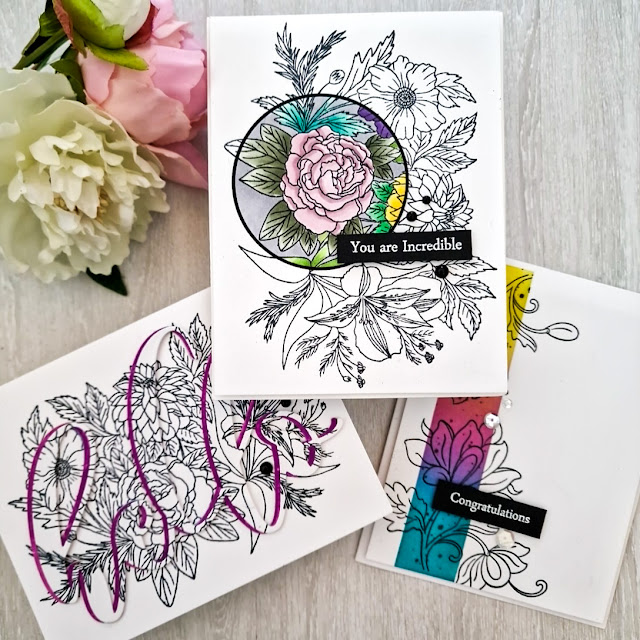
As I wasn't quite sure as to the cardmaking levels of the participants at the time when planning my card samples, I tried to keep them simple but not too simple. I wanted crafters from beginner to more advanced levels to be able to follow along and do the techniques without a problem. For my theme I wanted them to have more of an elegant feel but still pop and have a bit of a WOW factor. So what better to go with elegant than black and white and of course to make them pop we had to have a bit of colour in there. And to keep them all cohesive, the same stamp sets and colours were used throughout. I had made 3 samples but had an extra 4th, just in case we had time. Yes I know I may have been reaching a bit there with a 4th in 2 hours, but hey....you never know lol.
Once my date, theme and samples were approved, I put out a call to my fellow cardmakers for some willing and eager participants to join me. I ended up having 10 lovely ladies joining myself, Erum and Virginia that day. I love how we had crafters of all levels and on different points in their AECP jourmey as well. I then sent them all the game plan, the full card samples (more than just the sneak peeks shown above) and a pdf with all the supplies needed well in advance of the class, so that they could be prepared for the big day.
1 week prior to I sent out several emails checking in with them all plus a reminder of all supplies needed and all the links and details needed for the upcoming Zoom workshop. I hope they didn't get sick of all my emails that week lol Better to be over prepared than not enough, right!
The Day Before
The day before the workshop I prepared all of my supplies that I'd need and cut all of my paper to size as well, so that I wouldn't have to do that at the last minute and would be fully prepared. I also got my video set up all ready and tried to figure out the 2 camera view situation with my husband, as this was new to me. As I was using both my desktop computer and my phone, we had a few issues with the sound echoing and a bit of feedback. I thought we had it figured out the evening before but alas nope...still had those issues the day of. However with the help of the more advanced Zoom users we got it all worked out just before the start time.
Game Day: Zoom Workshop
Leading up to the day of the workshop, I will admit that I was a bit nervous. Although I had previously taught cardmaking classes, that was so long ago. And as well as it being the final challenge, it just added to my nerves. However the day of once it got going, my nervous feeling went away and all was good. You just get lost in the cardmaking process that you don't have time to get nervous, as you are doing what you love doing....crafting and cardmaking.
I logged into the Zoom meeting 1/2 hour prior to, then Erum and Virginia logged in and then everyone followed. Once everyone was there and settled in, any last minute kinks were ironed out, introductions were made and we got started.
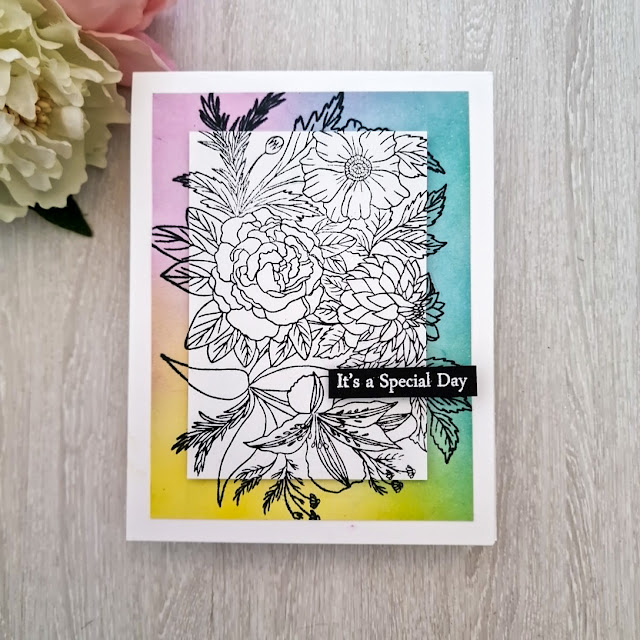
Card #1 - Ink Blending
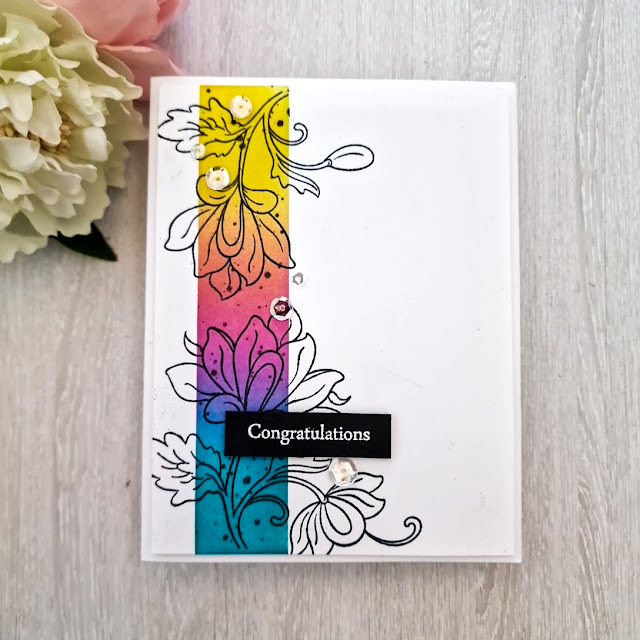
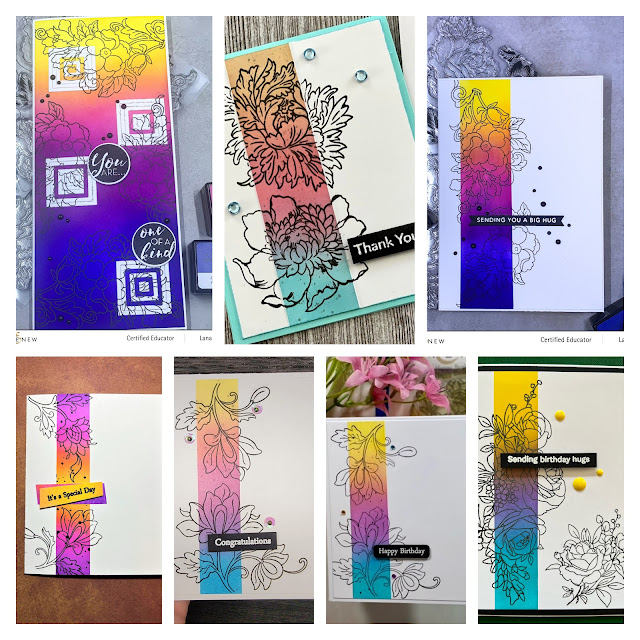
The first card was doing some masked ink blending a rainbow but with only 3 colours. You don't always need every ink colour in the rainbow to produce a rainbow. As long as you use complimentary colours, it will all turn out. If you aren't sure you can always refer to a colour wheel. I always have 1 in front of me at my craft desk, although I am ashamed to admit that I hardly ever use it or even look at it. We also did some ink splattering here, because let's be honest...every card needs some black splatters lol. Some of the participants used the same stamps and colours as I did and some used different images. Although in the supply list I sent to them prior to I had listed the stamp sets used, they weren't obligated to use them. Below are some of the cards made by the participants during the workshop.
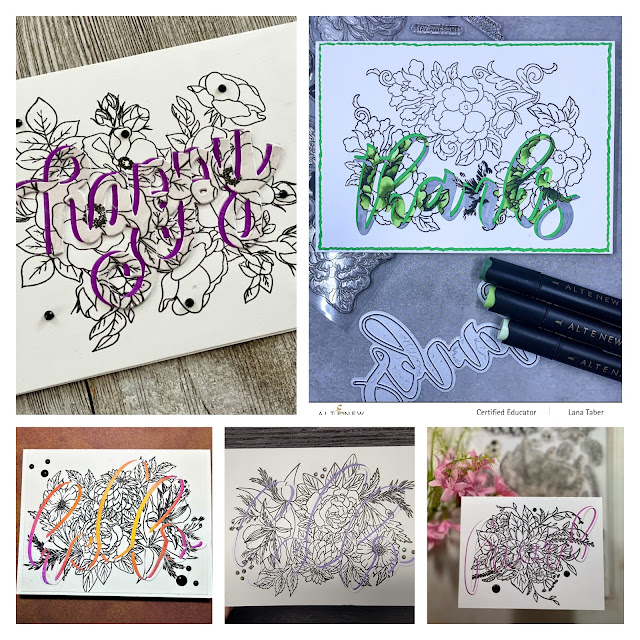
Card #2 - Inlaid Die Cutting

Next we did some inlaid diecutting using both the positive and negative pieces of the diecut (no waste here) and also more ink blending. In case you weren't sure as to what inlaid die cuttiing is, it is when you die cut an area of a card layer with another diecut cut using the same die but in a different colour (I hope that makes sense). This way the second die-cut layer sits flush in the other piece. However, I put my little spin on it, because although we did diecut with another colour, we also utilized all the pieces of the stamped image and therefore it had a bit of dimension to it because of the additional diecut layer. For this we left the main image in the black and white and had that pop of colour peeking out from the die-cut Hello. When we die-cut the stamped image we made sure to hold onto all of the little pieces, all of the innards if you will (is that a word??? lol) of the letters, so we could place them back in after. For the colour peeking out, we ink blended or ink pad swiped another piece of cardstock and cut out the same hello. We then pieced it all back together adding the ink blended hello slightly off set, so that you get that pop of colour coming through.
Although you have that coloured hello peeking out, there is still the continuous pattern of the stamped image because we utilized all of the die-cut pieces, so it all flows perfectly.
Below are some of the cards made from the participants. Again I love how although we are using the same techniques, they all add their own style to them.
Card #3 - Spotlight Colouring
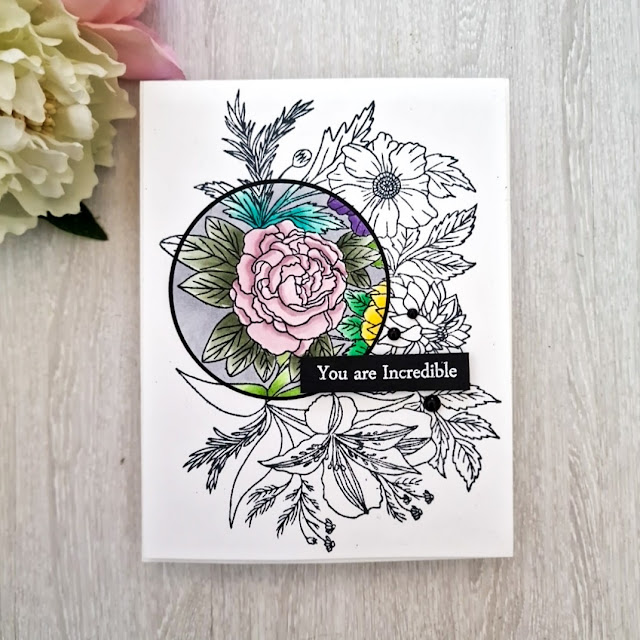
For the 3rd card we did some spotlight colouring using some alcohol markers. What is spotlight colouring you may ask? Well it is when you highlight one specific area of a stamped image and add colour there and only there. Thus it looks like you have a spotlight on that specific area. I think it kind of looks like you have a magnifying glass on it as well, zooming in on the image.
For this we stamped out the image and them diecut a circle from a selected section of the image. then we did some simple colouring using alcohol ink markers. Because this is such a small area that to be coloured, we didn't get too involved withe colouring. Just some simple colouring with a wee bit of shading for a little interest. To make the image pop even more, we added a layer of a black may below, to help to add to that spotlight feeling even more.
This is a fantastic and very effective technique to add a bit of colour and especially when you have have a more detailed image too. And adding that black layer under adds a bit of dimension to it as well. Can you tell I love a bit of dimension lol.
Below are some of the cards that the participants made during the class using the spotlight colouring technique. 1 person even made 2 cards!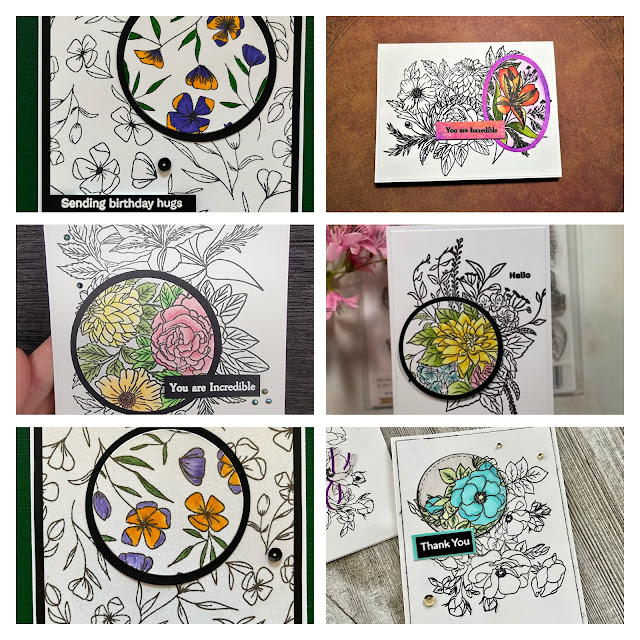
I had an absolutely wonderful time and once we got started, the time just flew by. i was very pleased that we got all 3 of my pre-planned cards made. Everyone was just the nicest and very patient, especially at first working out the technical issues. I was so glad to have met all of these wonderfully talented crafters!
I did learn a few things throughout the whole process. Make sure you are prepared and be sure to work out any little issues you may have beforehand. Although I thought we were good the night before, the same problems presented themselves the day of, but we got to it in the end...thanks to the more experienced Zoom users. While I was planning my cards for the workshop I was afraid that they may have been too simple, but I realized that sometimes simple can make just as much of an impact as the more involved and/or advanced cards.
Throughout the entire AECP program, Erum and Virginia are the most wonderful and supportive people. They truly and genuinely care about the participants in the program and them succeeding. Anything you may need or any questions, they are there to answer from day 1 right down to the minute before the final workshop. I have truly enjoyed every minute of this program and have grown so much as a crafter. Just the Altenew classes in themself are definitely worth taking, but if you really want to step it up a notch and take your cardmaking to the next level, I can't recommend enough the AECP program. It isn't just a program, there is a whole community of wonderfully supportive crafters.
Thank you so very much to all of the incredible ladies that gave up part of their Sunday, got up early to join us and also to our surprise guest that joined us as well, Rico the parrot! It really meant alot that you wanted to help me with this final step on my journey. You are all superstars! And to Erum and Virginia...thank you so much for your knowledge, patience, kindness and wonderful support that you have shown. You have built an amazing program that is filled with so much incredible knowledge and an even more incredible supportive community.
If you have made it this far in this longer than usual post, thank you all so much and I cannot wait for the next chapter in this incredible journey to begin (fingers crossed I pass). I wish you all the most wonderful and crafty day. Until next time,

Supplies Used:


.png)

I had loads of fun. It was a great workshop with a wonderful teacher. Thank you.
ReplyDeleteThank you so very much for joining us :) I am very happy you enjoyed it!
DeleteWhere did you sign up for this? Thank you
ReplyDeleteHi there,
DeleteThis was a workshop that I hosted. All of the lovely participants came from the Altenew groups on Facebook. Thanks for the inquiry :)
Oh Michelle, how BEAUTIFUL and THOUGHTFUL is this post! I was so impressed with your workshop! Everything went so smoothly with the workshop. Your instructions and knowledge truly show that you have what it takes to be an Altenew Educator. Not only you conduct the class so fabulously, you also have one of the class that has highest number of participants. Your methodical way of teaching is so easy and relaxing for all. Congratulations on this achievement. We can't wait for you to spread the love of Altenew! Thank you for your kind and heartfelt thoughts about AECP. Your wonderful write-up is definitely one that I will remember!
ReplyDeleteOh my goodness Virginia...thank you so very much! This is most definitely a wonderful way to start off the week! Your incredible feedback is so very much appreciated...thank you! I had a wonderful time in the workshop! Thank you again and I can't wait to see what the future brings! Michelle :)
DeleteHi Michelle!
ReplyDeleteI'm late to the commenting portion, but congratulations again on becoming an Altenew Educator! I loved being a participant! I'm almost at the end of my journey and you have encouraged me to cross the finish line!
I am so sorry as I'm a bit late to see your comment. Thank you so very much for your kind words Jennifer! It was a pleasure to have had you join me in my workshop :) I am so happy that I could help to encourage you to finish yours. Good luck with it and I am sure you will do amazing!
Delete