
Have you all started on your Christmas cards? Or are y'all a procrastinator like me and leave them to the last minute? Today I am sharing a simple ink blended slimline card featuring the beautiful Gingerbread Village stamp set from Maker Forte. This stamp set makes a beautiful Christmas card or even to send to someone throughout the holiday and Winter season.
To start my card I trimmed down a piece of mixed media paper to 8"x4", which is the size of the Slimline Oval Spotlight Stencil. Cutting it to the same size as the stencil allowed me to perfectly center the ink blending on the cardstock. I then started to blend Kitsch Flamingo, Seedless Preserves, Chipped Sapphire and Black Soot Distress Oxide Inks.
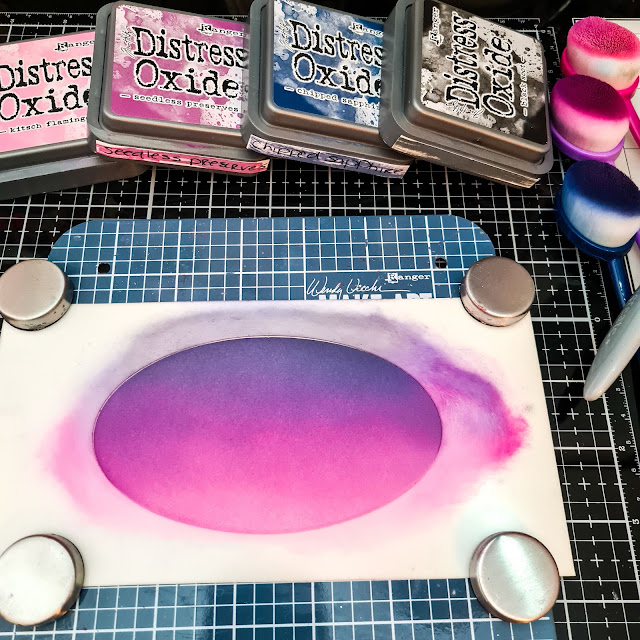
Once I was done with the ink blending, I left the stencil in place and set it aside for a bit to dry completely. For the houses and the sentiment I took a piece of the Eclipse Black Cardstock and prepped it with a whole lotta anti-static powder....just covered the paper with it. Because you know...black cardstock and white embossing powder....not a good mix sometimes. Plus I wanted to try and get as clean of an embossing as I could. The white residue from the anti-static powder just brushes off in the end. Or if not just take a slightly damp cloth and clean it off. Easy peasy lemon squeezy lol. For the heat embossing I used the Color Hive Clear Embossing Ink pad. Once I had them both heat embossed, I fussy cut out the gingerbread village and trimmed down the sentiment.

Although both myself and my hands despise fussy cutting, it was fairly simple and straight forward of an image. All of the delicate details in these houses are just beautiful....I absolutely love them! I decided to emboss these in white on black because I love the simplicity and bit of drama that it brings. Also I love the contrast it gives against the ink blended sky and crispness of the white card.
Once my ink blending was dry, I added some simple but oh so important white splatters. These white splatters help to give the illusion of stars in the sky. And okay, alright...every card needs some splatters! I very carefully removed the stencil so as not to smudge any of the white and then cleaned it while still wet. It's always easier to clean them while the ink or paint is still fresh or wet. My ink splatter box is very well used and loved, as you can see above lol.

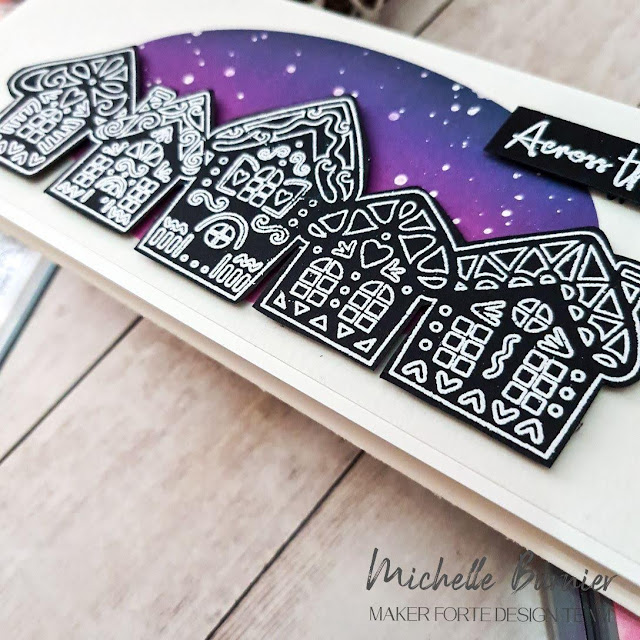
The images in the Gingerbread Village stamp set are just beautiful and all of the details in the houses are perfect! Now it's time for me to get working on my Christmas cards...I hope you all are better prepared than me lol. But at least now I have 1 checked off my list!
Thank you very much for stopping by and I hope you all have a wonderful day and 1st of December! Until next time :)

* ink blending brushes
* Wendy Vecchi 6x6 Make Art Station
* white paimt
* small paintbrush
* Canson multi medium paper
* paper trimmer
* clear heart embellishments of varying sizes
* Nuvo Deluxe Adhesive
* black adhesive squares
* Stampendous Fine Detail White embossing powder


.png)
Be First to Post Comment !
Post a Comment